Sunday, 30 June 2013

Little Christmas Treats

I have some older pictures to share today ... I made these for our Christmas Craft Sale, but never did post them!


They were made with the Stampin' Up 'Candy Wrapper Die'.  I have got to make some of these cuties for our Thanksgiving table using different papers and pumpkins.  :-)


The sparkly paper was just calling for a sparkly embellishment ... and these fun-foam snowflakes from Michaels fit the bill. I thought they would make cute stocking stuffers.

Thanks for stopping by today.

Saturday, 29 June 2013

Puppy Flip-It Card

Since my wonderful husband has been working on getting me a little crafting area at our cabin, my Cricut and I have renewed our friendship.  :-)


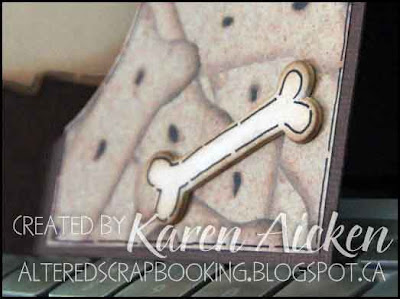
Yesterday when I was poking around in my studio, I came across this scrap of dog bone paper. Everything clicked and I made this cute puppy card using a Sizzix Flip-It die and a Cricut cut. The card itself was cut from brown Bazzil card stock, then the dog bone paper pieces were cut, trimmed and attached to the card base.

I wrapped the left side with narrow brown sheer ribbon and added some doodling.


The inside is left blank for now - the label is attached with removable adhesive so I can take it off to stamp or write a message when I decide who to send this card to and for what occasion.  :-) I didn't have anyone in mind, I was just making the card because I wanted to make a card.


I love this little dog bone, which comes with the Sizzix Scottie Dog die. I cut it twice - once from a scrap of white card stock and once from a chipboard coaster. When attached together it makes a nice sturdy embellishment.


The puppy was Cricut cut using the Doodlecharms cartridge and I added tiny black brads for his eyes. I wanted his ears to have some kind of pattern, so the dot stamp (Stamps by Judith) worked it's magic.


Thanks for stopping by today!


Friday, 28 June 2013

Monkey Love Note

I'm more than happy to announce that yesterday's crisis was averted.

The city's Emergency Response Team was once again stretched to the limits, but they managed to come up with a solution. The city  - indeed all of Southern Alberta held their breath during the almost 24 hour ordeal. The plan to use vacuum trucks & transfer the flammable liquid from the teetering rail cars onto another train, then pull the cars off the damaged bridge worked. There was no loss of life. There were no rail cars - weighing 80,000 lbs each - falling into the river. There was no flammable liquid spilled into the swollen river. 

 Larry MacDougal / THE CANADIAN PRESS

It could have been a major environmental catastrophe, and when the last of the rail cars had been emptied there was a country wide sigh of relief. Our newspaper called yesterday a "Day Of Nerves".  They weren't kidding.

Today I'm feeling quite a bit more normal (whatever THAT is haha) - and took some time to play in my studio. Haven't downloaded the pictures of those cards yet, but I do have a different card to share today ...


This is a Love Note I popped in the mail this week to our Grandkids (ages 11 mos & 2 years).  I had it finished a couple of weeks ago - the little monkey sticker cracks me up.


I used a Sizzix Pop N Cuts die with the star insert, and penned a little note on the white label.  The heart punch is by Stampin' Up, the labels and letter dies are also by Sizzix. Monkey embellishment is by K&Co.


It's a long weekend in Canada, and I am looking forward to some R&R in the sunshine. Hopefully only minimal news coverage of the Alberta Floods will seep into my hearing range.

This week was a really long one. Really long.  Thankfully it's Friday - and I hope you all have a good weekend. Thanks for stopping by.

Thursday, 27 June 2013

Birthday Card for our Daughter

This morning is a morning when coffee is needed.

I was up during the night with Mr. Cooper, who had an upset stomach; and I woke up this am to find our city in yet another emergency situation. Our State of Emergency hasn't even lifted from the flooding yet. Please send us your thoughts and prayers that this latest crisis can be averted, because if not ... well ... I can't even begin to think of the fallout.

I'm still not feeling very creative - there are so many people here that are in dire straits and the tragedy has almost overwhelmed me.  I do have a card to share today ... one I made before our city became a disaster zone. 


It might be a strange image to put on a birthday card, ha ha ... but it's actually perfect. Our daughter has red hair. Our daughter loves to garden. Our daughter is SO proud that she grows organic vegetables for her little family.  See? It's perfect!
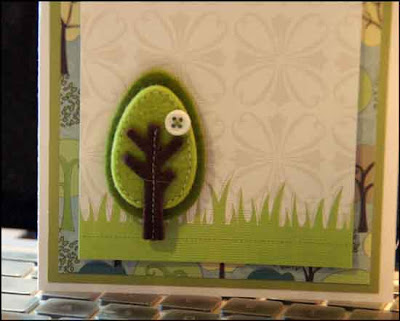

I used a Sizzix scalloped card die for the base, and this adorable scrapbook kit I found on clearance at our local scrapbook store last week.  (It was pouring rain that day -- who would have thought that a few days later our city and surrounding area would be forever changed because of water).


I actually made two cards from this kit, since I know how much our daughter will love the images. This one is for my parents to give her.

I think I need some serious card making time today, just to help me feel grounded again. However, I cannot tear myself away from the TV, watching this latest emergency develop here. We are in no actual danger at this point, but if things 'go south' ... nope ... won't send those thoughts into the universe. 

Big Sigh.

Sunday, 23 June 2013

Flowered Dog Card

Calgary is in a State of Emergency, & with all the flooding and devastation I just haven't felt much like playing in my studio.  However, I did find these card photos in my file - I made this earlier in the Spring when I couldn't get into my studio.


I used a coordinating paper stack, my Sizzix Puppy Dog Die, and yellow (yes, yellow!) Bakers Twine.


A peek at the inside.  I will add a sentiment when I go to send the card.


I'll be back later this week.  The flood waters are starting to recede and the massive cleanup has started. Thankfully, we escaped any flooding and continued to have power throughout the disaster.

Thanks for stopping by today


Friday, 21 June 2013

Merry Monday #67


This week I thought I'd play along with the sketch (#67) for Merry Monday at Always Playing With Paper.


I didn't add the horizontal strip though, anything I placed just detracted from the wreath and certainly didn't add anything to the card.


The wreath is a Memory Box die, but before I attached it I stamped a bunch of dots (Stamps By Judith) in red, green and brown. Once the wreath was attached I added a few dots of glitter glue.  The Cardinal's are stickers - aren't they sweet?


Inside, I added a panel of the same pale blue print paper as is on the outside, stamped the words then die cut them out attaching the label with Stampin' Up Dimensionals.


Thanks for stopping by today!


Thursday, 20 June 2013

Sparkly JOY Christmas Tags

W O W !!!     My 'Shades of Green' Christmas card took Top Honours at the 52 {Christmas} Card Throwdown Blog.   Wow!  Thanks ladies - thanks very much for liking my card enough to choose it.

 
 While I was cutting ornaments for Christmas cards, I decided to make a couple of gift tags too.


Each tag was cut twice ... the first (top) layer was cut out of red & white sparkly paper with the word JOY cut out of the top.  The remaining layer was cut from white cardstock and attached to the sparkly ornament.  "To & From" are stamped on the back side.


I added red Bakers Twine so the tags can be tied onto a gift bag as well as a package.

Thanks for stopping by today!

Wednesday, 19 June 2013

Flip-It Card for Sue

Today's share is the card I sent to Sue for June 1st. (For those of you who don't know, Sue lives in a different city than I do, and we pop something in to the mail to each other on the first of each month.) I wanted to send her a Flip-It card so used my Sizzix Rectangle Flip-It.


 I will often add a border or cardstock strip to the narrow side of the die cut card base to give it more stability. This time I used a scalloped border and tied red Bakers Twine around the seam.  The front says "You Look Fabulous", and the inside says "now say it back to me!".  


I had fun with my embellishment stash for this card, which has touches of shimmer and shine. 


Thanks for stopping by today!

Tuesday, 18 June 2013

Christmas Ornament Cards

This week's challenge at the 52 {Christmas} Card Throwdown, is a theme challenge ... Christmas Ornaments.


 I put my Tim Holtz ornaments die to work, combining it with two of his word dies. Since the ornament dies are a 'mover and shaper', the magnetic words nestle right inside the ornaments and cuts with one pass through my Big Shot.


The ornaments are cut from a beautiful red heavyweight, pearlized card stock, and I backed the opening with white so the words would show through.  A little metallic trimmed ribbon at the top of the ornament finished it off. I loved the way they turned out, I made a set of six cards, and also a few extra ornaments for other cards/tags!


I used some different papers from my stash for the backgrounds on these A2 sized Christmas cards.  And into the stash they go!

Thanks for stopping by today.

Monday, 17 June 2013

Puffy Tree Sticker Cards

Well the the fellows were all very impressed with their Father's Day cards this year, so that made me happy.

My wonderful hubby has my craft area almost finished at our cabin, so that also makes me happy. VERY happy. I have a little lamp and a work space, and some drawers for storage. I love working on cards on Sunday mornings, when everyone is sleeping and I pretty much have the house to myself. I haven't had a work space there for over a year, and I had no idea how much I missed it until I had one again. Still some things to do, but it's almost done!

Also, my Stampin' Up order is here. That is always exciting. Not a huge order - but I did get the new 'Flower Shop' bundle (stamps and coordinating punch) and some awesome large brads. They will make great eyes or noses on my Sizzix dog dies ... so I hope to get some playtime in this week. And the SU owl punch is now living at my house. Woo Hoo!  :-)

Today for Masculine Card Monday, I have two A2 birthday cards to share - both of them 'Clean And Simple' and almost identical.


The puffy felt tree stickers are SO cute - I found them on clearance one afternoon and knew just what I wanted to do with them.  Word stamps are by Verve. (Sorry for the off-colours in the photos ... it was too late at night to be taking pictures without a flash!)


Right into my Masculine Card stash with these ones ... thanks for stopping by today.

Sunday, 16 June 2013

New House Card

Friends of ours moved into their new house, very close to ours. We brought them over a couple of bottles of wine and a loaf of home made bread the first weekend, but I didn't have the card with me.  Last weekend, I left it in our 'cabin bin' so didn't have it with me AGAIN. Hopefully I will see them this weekend. Sheesh.


I had picked up this scrapbook set (MME) at least a year ago because the colours were so fun and cheerful. The house print is perfect for a new house card! I used a patterned sheet of paper from a different stack with a ScorePal to make a coordinating A2 sized envelope.


Just for fun I fussy cut one of the houses out of scrap paper and popped it up with foam tape.


A few die cut clouds and printed embellishments from the package to finish off the inside, then I added a Tim Holtz die cut key with a bit of bakers twine.


Such a cheerful way to wish them all the best in their new place.

Thanks for stopping by today!


Saturday, 15 June 2013

Sweet Cherries

I have another older card to share today ... this one was done for a Dynamic Duo's colour challenge. I was a guest designer at the time, and felt this card was just a little too Clean and Simple to be posted as a designer's inspiration piece.


I used the Papertrey Ink Button Bits stamp set, and a button die. The buttons are popped up with foam tape, but the card is still completely mail friendly. Much more so than if I'd used real buttons.


This one went into my stash, but now I'm thinking it might make a sweet Love Note to send to the Grandchildren when their other Grandma brings them a huge box of BC cherries!


On this computer monitor (I'm using a Very Old Windows Computer this week) the green card base looks very dull. It is the Stampin' Up Pear Pizzaz - a lovely and bright shade of green.

Thanks for stopping by today.

Friday, 14 June 2013

Lovely Layers Note Card

This Spring I wanted to send my friend Sue a card to let her know I was thinking about her. I wasn't able to get anywhere near my craft room, so only had limited supplies. I'm still happy with how this card turned out, using lots of my new dies. 


The center embellishment was made with the Papertrey Ink 'Lovely Layers' die set - it had been on my wish list for a very long time.  The scalloped card base is a Sizzix die, and the finished size of the card is 4.5 x 6". I'm really liking  using this 'in between' size! Next month I think I will order some envelopes to use especially for this size of card as the one package I do have is running low.


I added another 'Lovely Layers' embellishment inside, as well as patterned paper panels to give the card a little more 'heft'.

Thanks for stopping by today!