Showing posts with label Easter 2014. Show all posts

Tuesday, 5 August 2014

Crocus Sticker Card

Good morning friends!

Thanks to everyone who inquired about our little Olivia. She is doing better as of yesterday, but it has been quite a concern. She was refusing to eat - even ice cream - or drink water. And it's HOT out so dehydration was something we were watching for. Then our daughter realized that the spoon hurt Olivia's tongue, as did the rim of the cups. When they suggested she 'put her whole mouth into the cup' and slurp … she was able to drink water again. Whew. As of yesterday, she was able to get down some baby food using one of those tiny baby spoons. She is a hungry 3 year old and SO happy to be able to eat something other than Yop, chocolate milk and water. She will start to feel better now that she can eat again.

I have another older card to share today … this was one that I set out at Easter, but didn't get posted.


I outlined the panels with my Sakura Sparkle gel pen, and you can see how it catches the light when the card is turned.


Thanks for stopping by today!

Friday, 18 April 2014

Flip-It Easter Cards

Good morning friends!

It's Flip-It Friday here on my blog, and I have three Flip-It Easter cards to share today.


These adorable stamps are by SugarPea Designs.  For this first one I tried something different. I stamped and coloured the image with pencils, THEN covered it with an Elizabeth Craft Designs double sided adhesive sheet, and polished in the Silk Microfine Glitter.  I wasn't too happy with the result - the colours and outline were far too muted. I went over the stamped image with a Pigma Micron pen though, and that helped bring it to life again.


For this second card, I didn't do any glitter other than to add some Stickles to the bunnies tail.  I used one of the new Elizabeth Craft Designs embossing folders to add some texture to the white panel, and some scraps of green card stock.


While I was making these cards, I was also trying to use UP some bits and pieces I had laying around. Rather than cut into another sheet of patterned paper for this third one though, I used the "Lots of Dots' embossing folder. I like how fresh and clean it looks!


Supplies used:
Circle Flip-It - Stephanie Barnard (Sizzix)
Bunny stamps - SugarPea Designs
Happy Easter stamp - Stampendous
Lots of Dots embossing folder - Elizabeth Craft Designs
Double Sided Adhesive Sheet - Elizabeth Craft Designs
Warm Diamond Silk Microfine Glitter - Elizabeth Craft Designs
Circle dies - Spellbinders  
Stickles
Label punch - Stampin' Up
Coloured pencils - Prismacolour
Gamson and blending stump


Thanks for stopping by today!

Sunday, 13 April 2014

3 Panel Katie Label Pivot Card

Good morning friends!

I have an Easter card to share today using the Katie Label Pivot die.  Here is the front ...


Those chick stickers are SO cute; I just couldn't resist them.


The card opens up to reveal another chick ...


... and then you unfold it again to see the third and final chick!


I decided I wanted the card to open with the solid panel on the left because when I tried it the other way, I could feel the Katie Label Pivot openings with my fingers. That instinctively made me turn the card over to see what I was feeling. I felt it sort of ruined the surprise of the inside pivot.


I used a 12 x 5" wide piece of double sided card stock. Then, I scored the 12" side at 4" and 8".  The Katie Label Pivot goes on the 4" score line.  Depending on the paper you choose, you may end up trimming a scant 1/16" off the far left edge so it doesn't interfere with the folds when you close the card up.


I am going to do this again for sure - I like that extra panel for adding a message. For this card, I penned "Happy Easter to some wonderful peeps".


Supplies used:
Katie Label Pivot - Pop it Ups, Karen Burniston (Elizabeth Craft Designs)
Scalloped circle, Circle Accordion - Pop it Ups, Karen Burniston (Elizabeth Craft Designs)
Chick stickers - Jolee's Boutique
White card stock
Double sided patterned paper - Dear Lizzy, American Crafts


Thanks for stopping by today!


Saturday, 12 April 2014

Easter Crocus Embossed Card

Good morning friends!

I have another Easter card to share today, using those lovely 3-d floral stickers I used on an Easter card I posted earlier.


I used an embossing folder on the white panel, some older papers from my stash that  outlined with m Sakura Stardust pen. I used some punches from my stash as well as gems.


The card is a standard A2 size, but since I made it last year I didn't keep track of the supplies used.

Thanks for stopping by today!


Friday, 11 April 2014

Katie Label Pivot with Easter Chick

Good morning friends!

I have an Easter card to share today, made using a couple of Pop it Up dies by Karen Burniston for Elizabeth Craft Designs. The card itself is a standard A2 size. First I cut the front edge with one of the Agatha Edge dies, then I used the Katie Label Pivot to cut the animated feature.


I loved these adorable chick stickers and I think they make perfect Easter cards! I added some hand lettering and some pretty yellow seam binding. I have never (NEVER!) been a yellow person, yet I seem to be drawn more and more to yellow.


Finally, here is the view from the back and the front:


Supplies used:
Katie Label Pivot - Pop it Ups, Karen Burniston (Elizabeth Craft Designs)
Agatha Edges - Pop it Ups, Karen Burniston (Elizabeth Craft Designs)
Chick & egg stickers - Jolee's Boutique
Yellow seam binding
Patterned paper - Prima


Thanks for stopping by today!


Wednesday, 9 April 2014

Easter Bunny Trio

Good morning friends!

I've been able to spend the past couple of days getting lots of cuddles in with our newest Grandbaby (Zachary). He seems soooooo tiny! Olivia is still madly in love with him, and even Ethan is coming around.


I wanted to make the Grandkids some cute Easter cards, and have been seeing versions of this one all over Pinterest. When I saw THIS one by Nancy Amato though, I knew I had the one I wanted to make. Especially since I also had the new word bubbles stamp set from Stampin' Up.  :-)


To create the bunny, I used dies from both Karen Burniston's Oval Accordion set and the Circle Accordion set ... even the little heart for the nose is in the Accordion Oval!  The eyes were cut from black card stock scraps using one of the circles in an Elizabeth Craft Designs Flower Die set and I touched each one with a white gel pen.


Now the word bubbles were facing the wrong way, but I just flipped them over and used the 'wrong' side. I penned their names using Tombow markers, and the background uses one of the new embossing folders at Elizabeth Craft Designs.

Since Olivia loves everything girly (including Pink and Purple), her bunny got Stickles on the nose, and a few Glitter Flower Peel-Off's.  Not to leave them out, the boy bunny noses got a lick from my Wink of Stella glitter pen. :-)


I think they turned out pretty cute, and I know the kids will love them. Well, Olivia and Ethan will. At 2-1/2 and 1, they have this card thing figured out! Zachary will be a month old and probably won't really care.  

Supplies used:
All three cards are the standard A2 size
White card stock
Coloured card stock - Colorbok
Dots embossing folder - E114, Elizabeth Craft Designs
Ovals - Oval Accordion, Pop it Ups - Karen Burniston (Elizabeth Craft Designs)
Circles - Circle Accordion, Pop it Ups - Karen Burniston (Elizabeth Craft Designs)
Eyes - 701 Flower Set 1, Elizabeth Craft Designs
White Sakure gel pen
Glitter Flower Peel-Off's - 7048, Elizabeth Craft Designs
Speech Balloon die - Stampin' Up
Tombow Markers

Thanks for stopping by today!


Tuesday, 8 April 2014

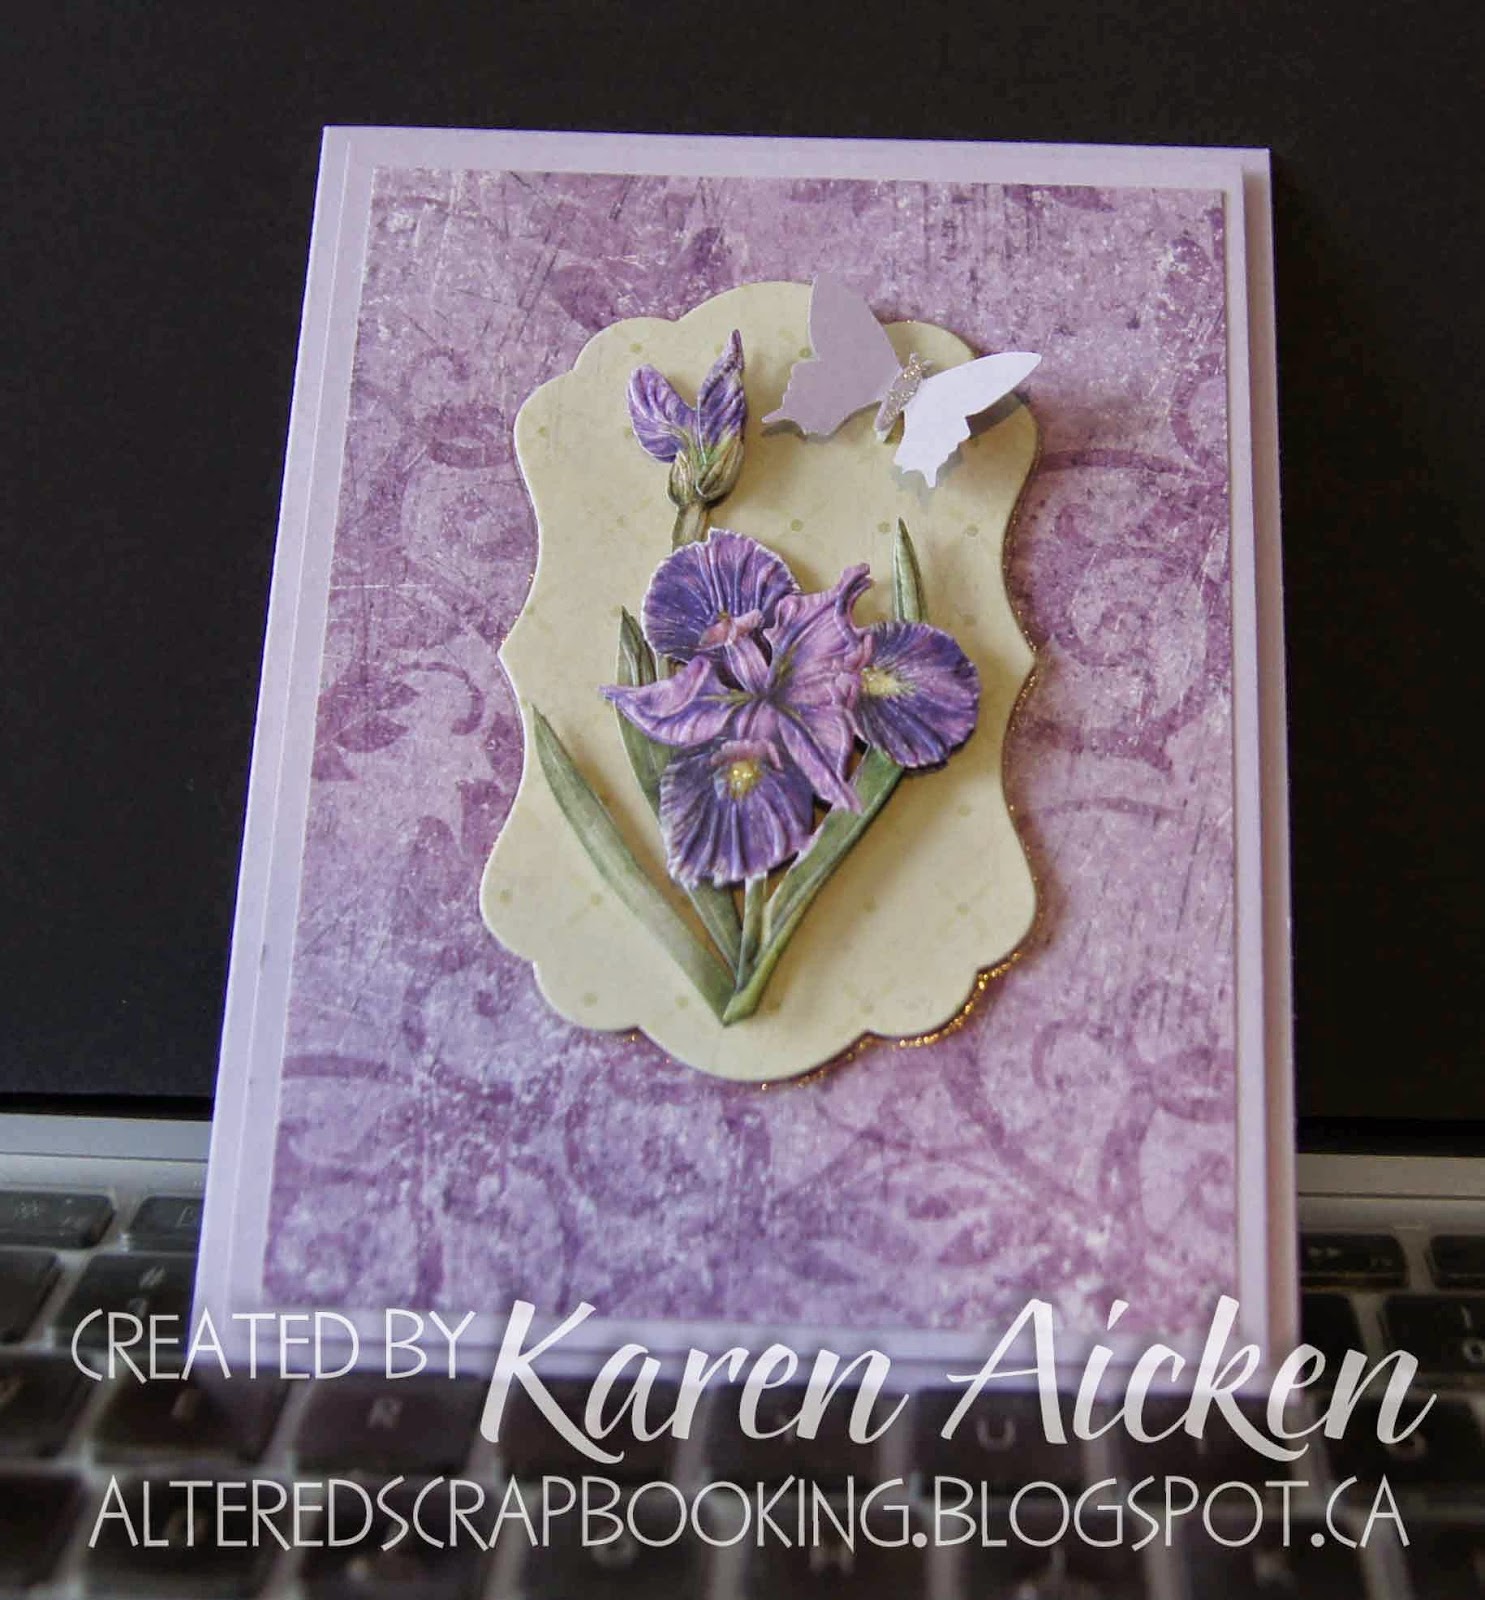
Iris and Butterfly Easter Card

Good morning friends!

I work ahead a fair bit - I like to make seasonal cards but often am too rushed to create and send the cards during a holiday season. So I make them at my leisure and have them ready to go when I need them. This one was made sometime last year, which is why it is not a Pop it Ups card!


I made a couple more cards using the 3-d sticker package, and will share those soon.

Supplies used:
Card is a standard A2
Pale purple card stock - Stampin' Up
Patterned paper - K & Co
3-d Iris sticker - K & Co
Label die - MFT
Sakura Glitter gel pen
Foam tape
Butterfly punch

Thanks for stopping by today!

Sunday, 6 April 2014

Shimmery Butterfly Pivot for Easter

Good morning friends!

I wanted to send a Pop it Ups card to a Pen-Pal for Easter, so decided to go with the Butterfly Pivot.


The card is a standard A2 size, and I used the Agatha Edges to cut the decorative edge on the right from Shimmer Sheetz. Then, I embossed it - the embossing folder is called Swirly Curves, but it reminds me of a butterfly wing. (I love that embossing folder). I also cut the butterfly overlay from the same Shimmer Sheetz. It shimmers and shines and is just beautiful!


On the inside, I added two patterned paper panels cut with the Agatha Edges and penned the words with a Tombow Marker. These are dual tipped markers - brush at one end, fine point marker on the other.


See how the Shimmer Sheetz catches the light? It's SO irridescent & reflective and changes colours as the card is turned. Perfect for a butterfly!


Finally, here is the card from the back ...


She is going to love this when she opens it, I just know it.

Supplies used:
Butterfly Pivot - Pop it Ups, Karen Burniston (Elizabeth Craft Designs)
Agatha Edges - Pop it Ups, Karen Burniston (Elizabeth Craft Designs)
Shimmer Sheetz - Elizabeth Craft Designs
Embossing Folder - E119 Swirly Curves, Elizabeth Craft Designs
Patterned card stock - Prima 


Thanks for stopping by today!

Saturday, 5 April 2014

Easter Bunny Cards

Good morning friends!

My Mom asked me to make them an Easter card for each of their Great Grandkids, so this is what I came up with ...


While it's hard to see in the photo, the tails were cut from the Self Adhesive Velvet Sheets at Elizabeth Craft Designs. I'm finding all kinds of fun uses for those, especially since you can get them in so many lovely colours!


Mom gave me the bunny stamp and die in my Christmas stocking, so it was fun to be able to use it on their cards. I hand lettered the kids names on the little heart label that comes with the Lucy Label Pop Up die set (Karen Burniston for Elizabeth Craft Designs)

Supplies used:
White card stock
Bunny stamp and die - Papertrey Ink
Bakers Twine
Heart label - Lucy Label Pop Up, Pop it Ups - Karen Burniston (Elizabeth Craft Designs)
Polaroid Frame die - On Film, Stampin' Up
Tombow Markers
Yellow Polka Dot patterned paper - Dear Lizzy, American Crafts
Aqua patterned paper/Floral patterned paper (double sided) Basic Grey
White Velvet Self Adhesive Paper (bunny tails) - Elizabeth Craft Designs.
Wink of Stella (on Olivia's bunny)


Thanks for stopping by today!


Tuesday, 11 March 2014

2nd Spring Designer Challenge Card

Good morning frirends!

I found a package of sweet bird stickers when I was poking around Michaels one day, and picked them up even though I didn't have a plan for them. Then Karen Burniston announced her March Designer Challenge as a "Spring" theme using any of the Pop It Ups die collection. Bingo!


First, the front of the card. I love the chalkboard look that is so trendy right now, so kept the front of my card nice and simple. I added pink buttons from the same sticker sheet to chalkboard printed paper and the front was done!


I used the 'Lots of Pops' Pop it Up die for the card inside.  The Pop it Ups dies are unique in that you can choose the size of card and  you can place the die anywhere along the fold of your card. I chose to keep the pop up portion towards the left edge, leaving me room to place the trellis on the right.


That sounded good in my head, but when I cut the Bamboo Trellis, it was too wide for the area.  The remedy was to cut the trellis into two vertical pieces, slide one over the other and attach them in place. I was so pleased at how well the two pieces lined up! The added bonus was the doubled up layer gave the trellis more stability.  In the photo below, you can see the join - it's on the left of the trellis. (You can also click on the photo to enlarge it).

I used a banner die that comes with the Lots of Pops die & Bakers Twine to create the little banner at the top left, adding more buttons from the sticker sheet.


I wanted it a little more stable so I added a 1" strip of transparency to the back that extends the full height of the trellis.


The crochet flowers were also an impulse buy at Michaels (I know - I'm weak.) but I sure loved having them to use on this card! I added a few tiny Glitter Flowers to the crochet ones for a bit of shine.


I cut one of the labels that come with the Lucy Label Pop Up and hand lettered 'Spring has Spring'.  After inking the edges, it got popped up on the Lots of Pops platform. One of the Curvy Leaves and a bird sticker were added to the smaller (optional) bump that cuts with the Lots of Pops.


I trimmed a couple of strips from additional patterned paper and attached them across the bottom enter of the card.


Below you can see how I attached the trellis to the card. Once it was decorated, I decided I didn't want it flush with the inside. I cut a 3-1/4" x 1/2" strip of patterned paper.  I scored 4 lines, 3/4" apart which left me with a small tab to attach the strip into a 3/4" square 'box'.   I attached it just barely above the fold line.


All in all, I was happy with how this card turned out, and it will be going to someone special this Easter.  :-)


Be sure to check out the rest of Karen Burniston's Designer Challenge Team (links on my sidebar, to the right) to see what they've come up with for the challenge, and the Elizabeth Craft Designs Blog tomorrow when Karen B does her post!

Supplies used:
Lots of Pops - 778 Pop it Ups, Karen Burniston (Elizabeth Craft Designs)
Lucy Label (Label) - 779 Pop it Ups, Karen Burniston (Elizabeth Craft Designs)
Bamboo Trellis - 727, Elizabeth Craft Designs
Curvy Leaves - 730, Elizabeth Craft Designs
Glitter Flowers  - 7048 Elizabeth Craft Designs
Bird stickers - Martha Stewart
Patterned paper - We R Memory Keepers
Crochet Flowers - Michaels
Bakers Twine

Thanks for stopping by today!