Showing posts with label Blueprints Dies. Show all posts

Tuesday, 27 December 2016

Holiday Cards - From Bits & Pieces

Good morning friends

***NOTE:  I will be moving my cards and paper crafting to Painted Mountain Cards in the New Year. I will leave this blog open, as there are frequent hits from Pinterest and over 5 years worth of cards etc to reference.

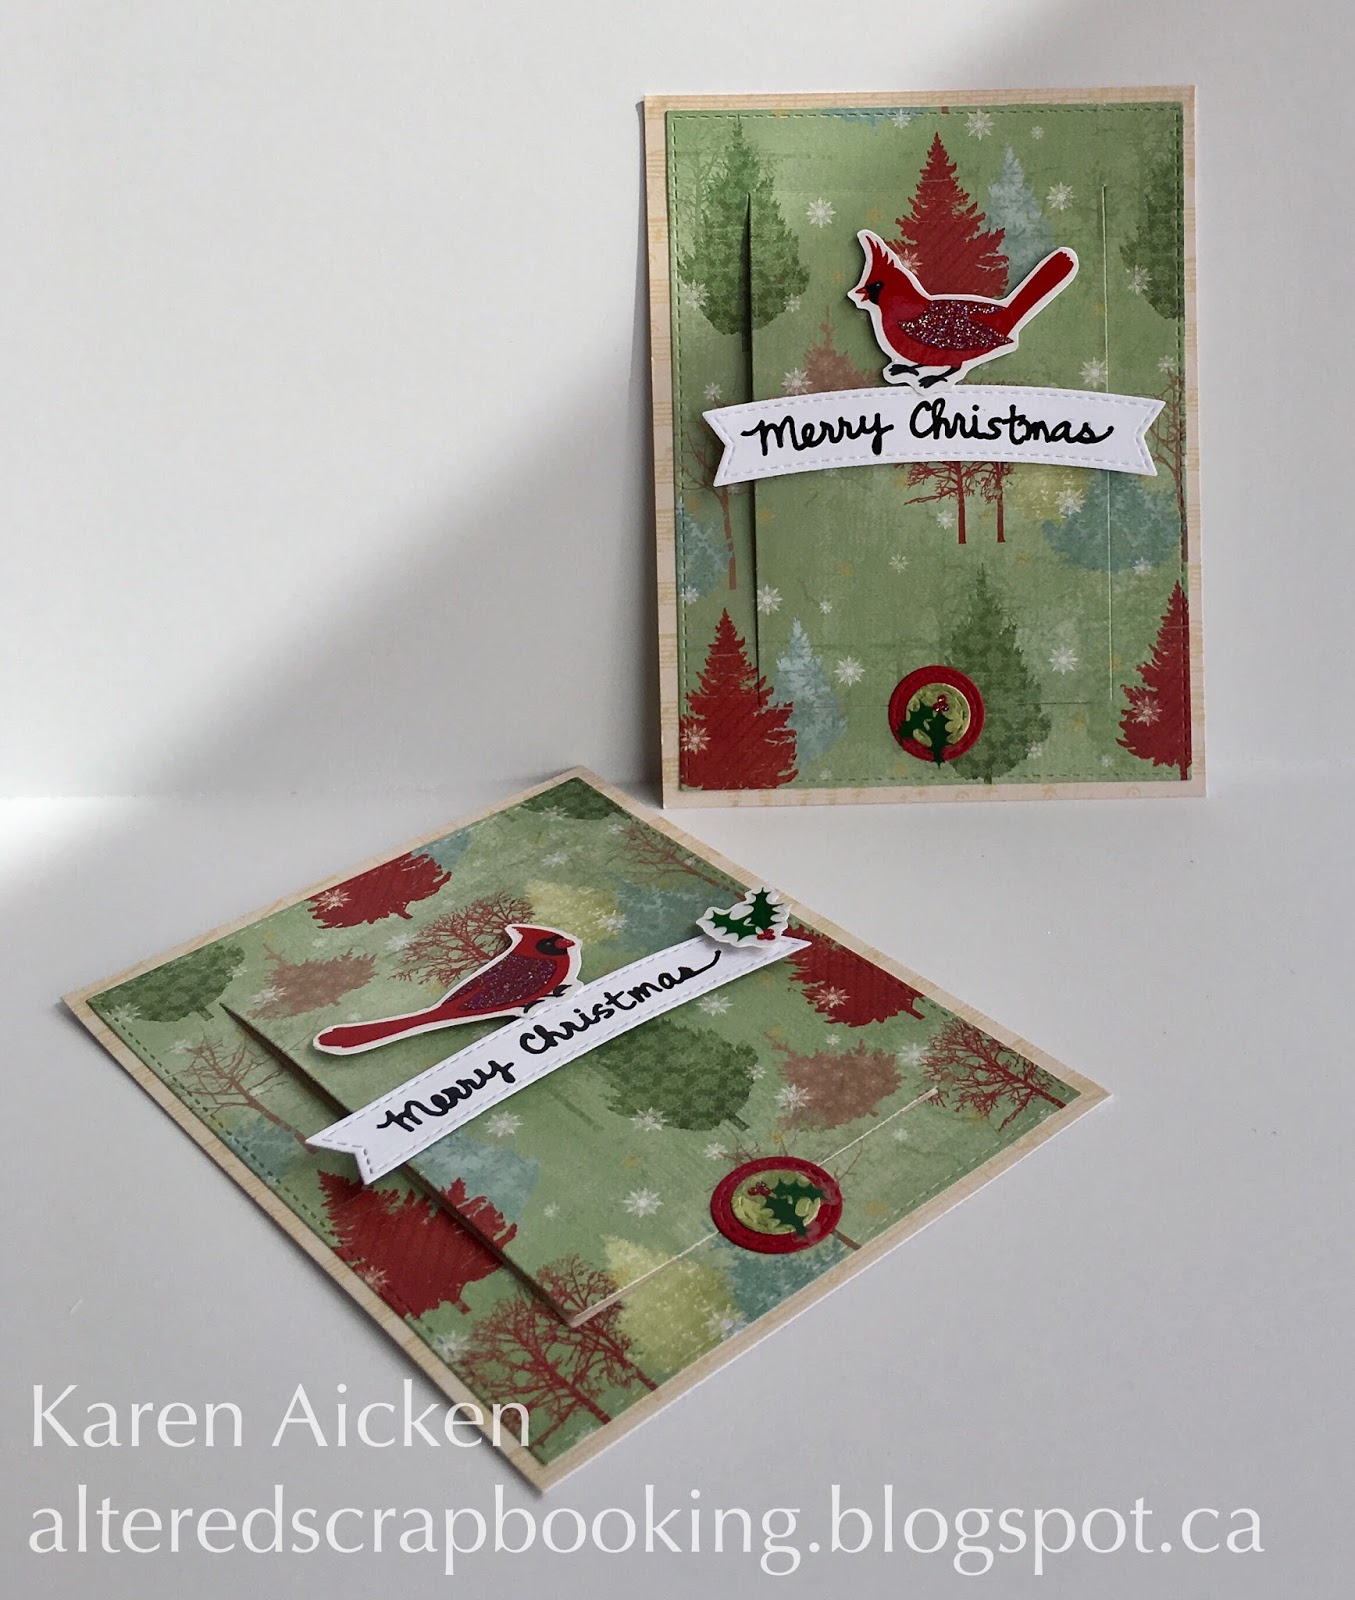
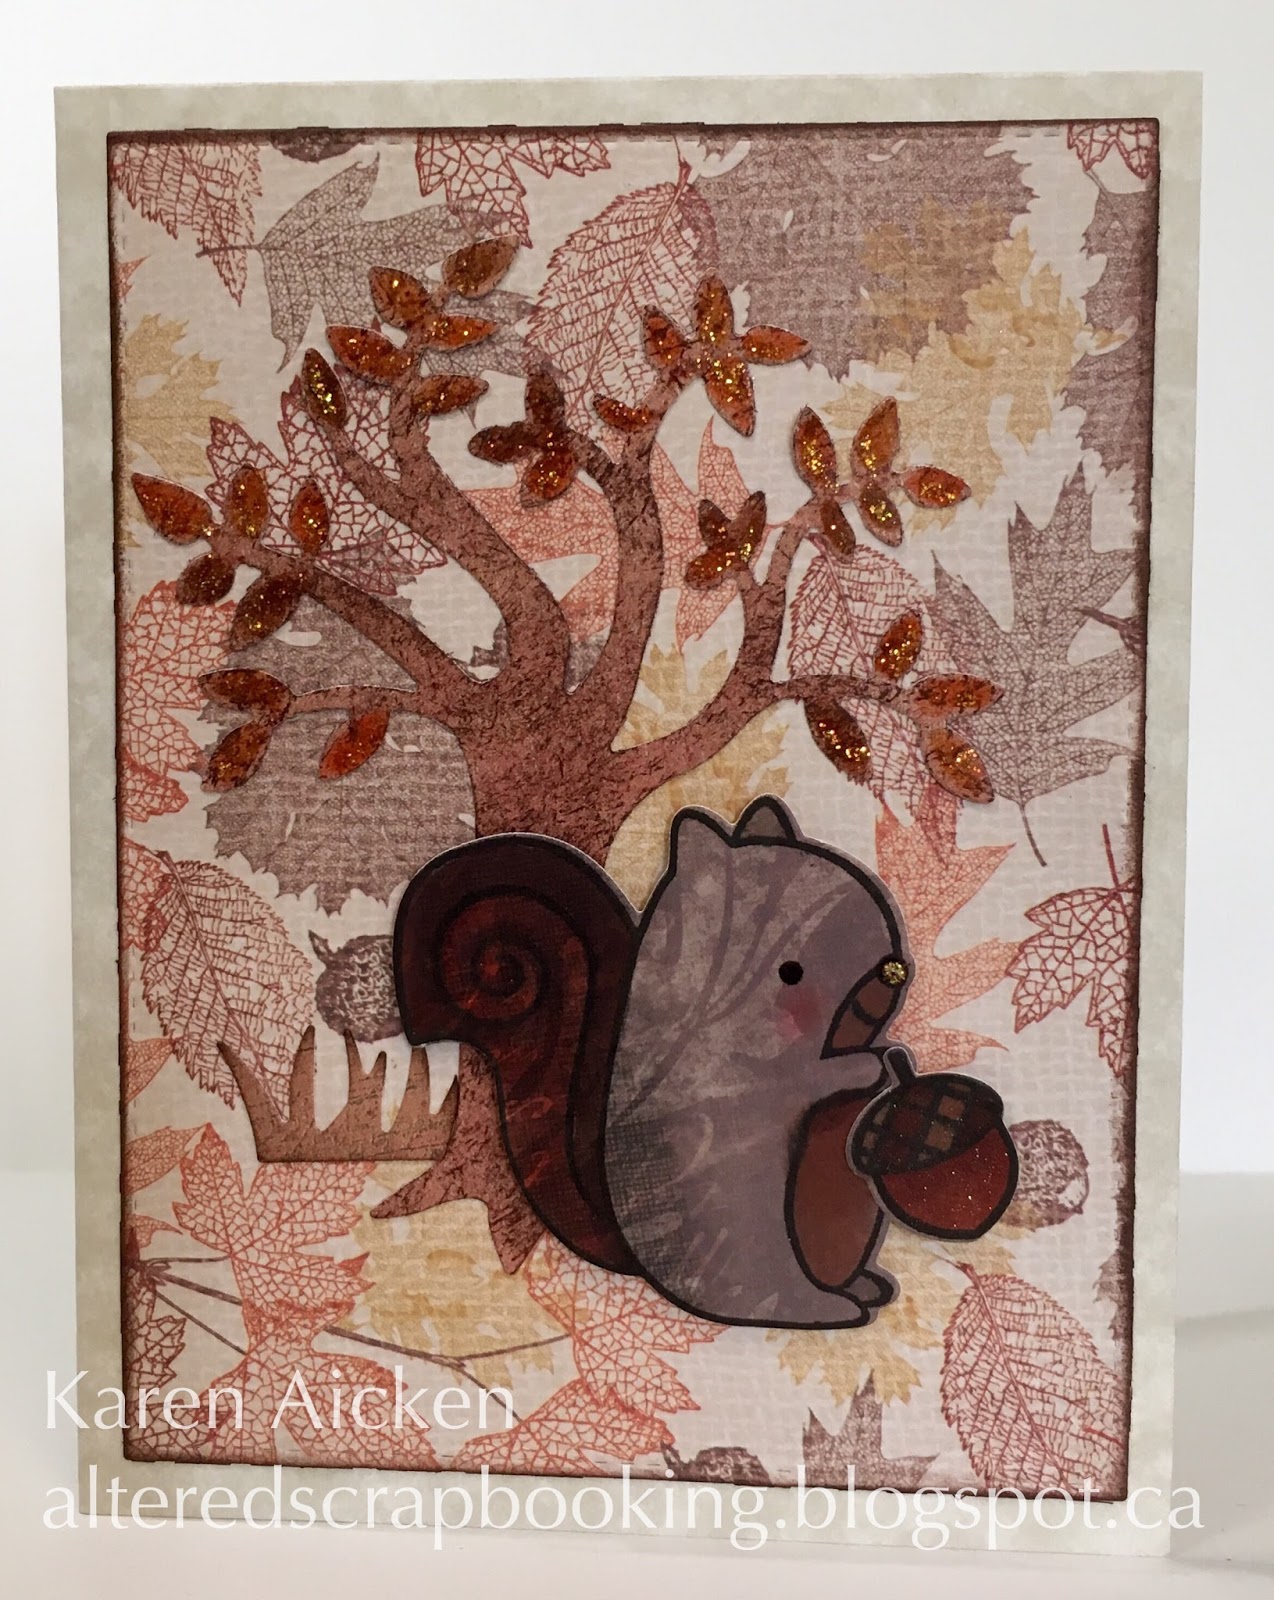
The name of the game has been to USE THINGS UP as I worked on our Christmas cards this year. I had several pieces die cut and ready to mount onto card bases, so I combined those pieces with some stickers etc from my stash and made these three cards. I still have some Christmas cards to share this week, then I promise you I'll be onto something different.

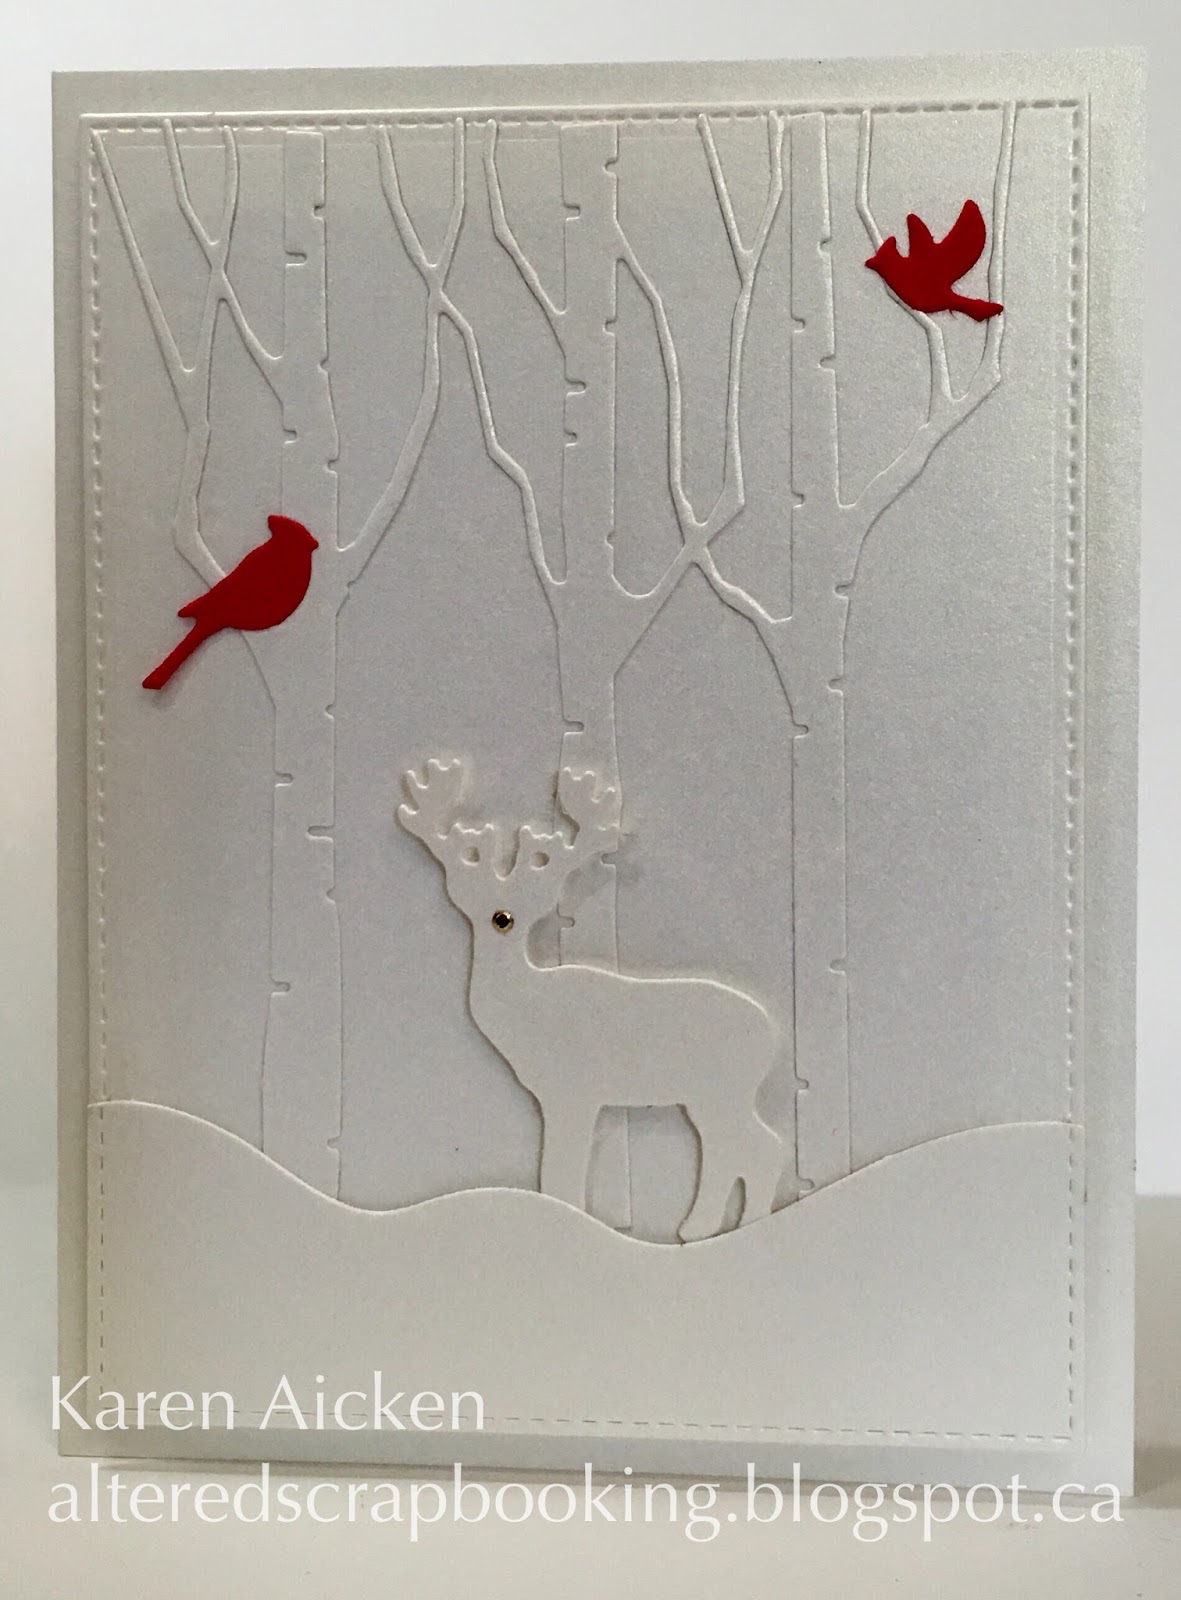
This first one has a super sparkly card base - I keep forgetting I have these, and they are perfect for holiday cards. The tree is a glittered foam tree sticker from my stash.


I had two panels cut for these next two cards, but that was before I had stitched rectangle dies (which I love, by the way). I re-cut the panels with a Blueprints stitched rectangle then mounted them to the dark red card bases.


The vintage red snowflake paper was too pretty to throw away anything but the tiniest scraps. I used a couple of the smaller leftover pieces for these two cards as well as 3-d snowflake stickers from my stash.


This week I've had all my blog posts scheduled so I can spend time with friends and family.

Supplies:
Folded cards - DCWV
Blueprints #1
Blueprints #???  with bracket
Snowflake stickers - K & Co
Tree stickers - Michaels
Clear double sided adhesive, 1/8" width - Elizabeth Craft Designs
Stamps - Verve
Glitter Dots - Elizabeth Craft Designs
Cream card stock
Scalloped scissors
Bakers Twine

Card sizes - A2

Thanks for stopping by today


Saturday, 24 December 2016

Cardinal Gift Card Holders

Good morning friends

***NOTE:  I will be moving my cards and paper crafting to Painted Mountain Cards in the New Year. I will leave this blog open, as there are frequent hits from Pinterest and over 5 years worth of cards etc to reference.

Today I have two more Christmas Gift Card Holders to share.


You may have noticed that I use my Blueprints dies a fair bit ... I always feel like I get my money's worth from them. This one is the Blueprints #28.


I cut the notches to the inside panel, the notch die is a separate MFT die; it isn't included with the Blueprints #28.


I always like to have some nice holiday Gift Cards on hand, and if they don't get used this year I'm ahead of the game for next year!

Supplies:
Patterned paper - The Paper Studio
Gift Card Slots - MFT Stamps
Blueprints #28 - MFT Stamps
Black Glaze Pen
Stickers - the Paper Studio
Stamps on back - Hero Arts

Card sizes, standard A2

Thanks for stopping by today

Wednesday, 21 December 2016

Calligraphy Merry Christmas Card

Good morning friends

***NOTE:  I will be moving my blog to Painted Mountain Cards in the New Year. I will leave this blog open, as there are frequent hits from Pinterest and over 5 years worth of cards etc to reference.

Today's share is a holiday card using Suzanne Cannon's beautiful calligraphy Merry Christmas die. I have a couple of these lovely dies and don't use them nearly enough - going to remedy that for sure.


The Elizabeth Craft Designs Pine Cone comes in two pieces - a base layer and an overlay. Here, the base layer was cut from gold mirror card stock and the overlay from brown. I had backed the brown card stock with their clear double sided adhesive which made it much easier to adhere.


The bow was tied from seam binding, so it does lay nice and flat for mailing.

Supplies:
Spring with Berries - Elizabeth Craft Designs
Pine Cone - Elizabeth Craft Designs
Blueprints #24 - MFT Stamps
Soft Finish Card Stock, 100# weight - Elizabeth Craft Designs
Brown card stock
Gold foil card stock - Stampin' Up
Byron
Merry Christmas - Suzanne Cannon (Elizabeth Craft Designs)
Red card stock
Seam binding
Card base  & envelope - Michaels
Patterned paper - DCWV
Words inside - Verses

Card size - 6-1/2 x 5"

Thanks for stopping by today


Sunday, 18 December 2016

Polar Bear Christmas Cards

Good morning friends

Using Things Up (otherwise known as Whittling Down The Stash) has been the name of the game for our holiday cards this year. These Polar Bear cards have been in progress for at least 4 years.


The Polar Bears were Cricut cut from the Joys of the Season cartridge, and I did the printed panel on the computer. To complete the cards, I simply assembled the polar bear layers and stamped a greeting on the white area of the panel. The panel was cut with a stitched panel Blueprints die and adhered to the A2 card fronts.


The eyes and ears were dotted with a clear Glaze pen so they catch the light. I used the snowflakes from the All Season's Tree, which cut 3 at a time.


I forgot to mention that I used the MISTI for the stamping. The MISTI makes it SO easy to quickly - and perfectly - stamp multiple images.


***NOTE:  I will be moving my cards and paper crafting to Painted Mountain Cards in the New Year. I've been thinking about it for a long while, and the New Year seems like a good time to make the change. I will leave this blog open, as there are frequent hits from Pinterest and over 5 years worth of cards etc to reference.


Supplies:
Polar Bears - Cricut, Joys of the Season cartridge
Snowflake panel - created on computer
White card stock
Blueprints #24 - My Favorite Things
Misti  - My Sweet Petunia
Stamps - Papertrey Ink
All Seasons Tree (snowflakes), Pop it Ups - Karen Burniston (Elizabeth Craft Designs)
Tweezers - Elizabeth Craft Designs
Glaze Pen - Sakura

Card size - A2

Thanks for stopping by today

Thursday, 8 December 2016

'From Our House' Holiday Tags

Good morning friends

I have decided to move my cards and paper crafting to Painted Mountain Cards in the New Year. I've been toying around with the idea for a long while, and this seems like a good time to make the change. I will leave this blog open, as there are still a lot of hits from Pinterest and over 5 years worth of cards etc to reference.

Onto today's share ...

I have 4 gift tags to share today, made using the Hero Arts tag die. I've managed to use it a fair bit this season so definitely feel the purchase is justified.

For these tags, I cut the tag from red card stock then adhered it to a slightly larger white stitched circle. 'To & From' was stamped on the back of the tags.


Here is a close up of one of the tags. I stamped the words from Karen Burniston's Merry & Bright stamps on a Blueprints banner, and added some gold glitter dots. Gold is so trendy right now and I'm loving it.


Supplies:
Stitched Circle - MFT Stamps
Decorative tag die - Hero Arts
Blueprints #28 (Stitched banner)
Glitter Dots - Elizabeth Craft Designs
Word stamp - Merry & Bright, Pop it Ups - Karen Burniston (Elizabeth Craft Designs
Bakers Twine
Red card stock
White card stock

Thanks for stopping by today

Sunday, 4 December 2016

Four 'White on White' Christmas Cards

Good morning friends

I have decided to move my cards and paper crafting to Painted Mountain Cards in the New Year. I've been toying around with the idea for a long while, and this seems like a good time to make the change. I will leave this blog open, as there are still a lot of hits from Pinterest and over 5 years worth of cards etc to reference.

Onto today's share ...

I was hunting through my embossing folders for something specific, and these three snowflake ones caught my eye. I had my package of white pearl paper still out from a different project, so decided to make some white on white holiday cards.


These two are identical. I LOVE the way embossing folders work on pearlized card stock. I added some ECD Glitter Dots, and cut the label mat out of glitter paper. The words (outside and in) were platinum heat embossed.


This card got a die cut deer, as well as the heat embossed sentiment.


I had to add a small red Glitter Dot to the deer's nose.


Here is the final card with the heat embossed greeting on the front and a single Glitter Dot.


The inside of all four cards are the same as below.


Supplies:
Linen cards and envelopes - stash
Northern Flurry Embossing Folder - Stampin' Up
Distressed Snow Embossing Folder - Cuttlebug
Large Snowflake with Dots Embossing Folder - Sizzix
White pearl card stock - Gina K
Blueprints #24 - MFT Stamps
Glimmer Paper - Stampin' Up
Words were heat embossed with Platinum embossing powder
Words - Hero Arts
Fun foam
Deer - Papertrey Ink
Glitter Dots - Elizabeth Craft Designs
Words inside - Papertrey Ink
Clear Double Sided Adhesive, 1/8" width

Card size - all, A2

Thanks for stopping by today

Wednesday, 30 November 2016

Pretty Seasons Greetings Pop-Up Card

Good morning friends

I loved the Winter Warmth Stamp/die set (MFT Stamps) when it was released last year. Finally in late October I decided I was going to break down and order it. And it's every bit as wonderful as I'd hoped. The fact that it matches this pretty patterned paper was serendipity indeed!

Also new to me are the Swirly Scribble dies from Stampin' Up. I'm loving them! Here, I used it as a wreath.


Inside I used the Anita Frames Pop-Up by Karen Burniston for Elizabeth Craft Designs. I cut the outer card extra wide, cut each edge with a stitched scalloped border then wrapped them around to the inside. I do this quite often - I like how it brings the pattern and colour from the front to the inside.


Yup - I love the images from the Winter Warmth set. They just make me happy.


Truth be told, I think this is one of my favourite Christmas cards this year!

Supplies:
Patterned paper - My Mind's Eye
Stamps/dies - MFT Stamps
Anita Frames Pop-Up, Pop it Ups - Karen Burniston (Elizabeth Craft Designs)
Word stamp on front - Hero Arts
Stitched circle - MFT Stamps
Stitched scallop border - MFT Stamps
Blueprints #12 - MFT Stamps
White card stock
Red card stock
Scribble circle die - Stampin' Up
Glitter Dots - Elizabeth Craft Designs

Card size: Standard A2

Thanks for stopping by today

Saturday, 19 November 2016

C4C363 Sketch, a 60th Birthday Pop-Up Card

Good morning friends

It's Saturday so that means a new challenge at the Crazy 4 Challenges Blog. Our November 2016 Hostess is Maryann Einam and our Guest Designer is Doreen O'Brien from Doreen's Dream.

Maryann's has a sketch for us this week:  


Here is my card - I wanted to make a family friend a 60th Birthday card and when I saw this sheet of double sided paper I knew what I wanted to do. The sketch is on the front - I actually stayed pretty close to it!


I added the Happy Birthday from Karen Burniston's Happy Birthday Pop-Up, and the flowers & vine re from the Flower Pot Pop Stand. I put gold glitter dots in the centre of the flower for some birthday bling.


Inside is the Lorna Label Pop-Up, to which I added a die cut '60'. The numbers were also decorated with Glitter Dots.


The flowers from the Flower Pot Pop Stand is SO pretty, and comes in really handy when you want a little somethin' somethin'.


Check out the C4C blog to see how the Crazies have been inspired by the challenge. We'd  love to see your take on it, so be sure to stop by the Crazy 4 Challenges blog and link up your creations. If you are uploading to an online gallery, please use the keyword C4C363

On a personal note, we are now back in Canada. We took three days so the longest stretch I had to be in the car was 12 hours. Quite long enough. When I look at the bruising I have from the IV sites and blood work as well as around all four incisions - it's easy to understand that same bruising is throughout my belly. All the jostling that comes with highway driving for hours on end took it's toll. I am SO happy to be home, and I don't plan on getting anywhere near my vehicle today. Hubby has offered to go get groceries so I can stay home. What a keeper.

Supplies:
Patterned paper - Photo Play
White card stock
Stitched ovals - MFT Stamps
Flower Pot Pop-Up (flowers & vine), Pop it Ups - Karen Burniston (Elizabeth Craft Designs)
Happy Birthday Pop-Up (Happy Birthday), Pop it Ups - Karen Burniston (Elizabeth Craft Designs)
Glitter Dots - Elizabeth Craft Designs
Number dies - Stampin' Up
Blueprints #12 (banner) - MFT Stamps
Words - MT Stamps
Wink of Stella
Ring Frame Edges (open scallop 'banner'), Pop it Ups - Karen Burniston (Elizabeth Craft Designs)

Card size - 6 x 5"


Thanks for stopping by today
SaveSave

Sunday, 23 October 2016

Wobbly Pumpkin Card for Zachary

Good morning friends

I may have mentioned this, but our Grandson Zachary is a bit of a wild man. The last card his Mom gave him, lasted only seconds before it was torn up. With glee, but still. So his Halloween card this year is fairly simple. He will flick that pumpkin a couple of times then ... off it will come. Zachary is very good at being two.


The pumpkin sticker was added to one of Karen Burniston's Labels then on an Action Wobble. I pounced three bats from the Stage it Stencil onto the centre patterned paper strip - a fun way to customize your patterned paper.


A little bit of hand lettering inside, and a bat from the Bats Stage it Stencil.


Have at it, Zachary.

Supplies:
Sticker - Stash
Black card stock
Circles and Labels, Pop it Ups - Karen Burniston (Elizabeth Craft Designs)
Blueprints #23 - My Favorite Things
White card stock
Patterned paper - Recollections
Action Wobble
Bic Markers
Bat Stencil , Stage it Stencil - Karen Burniston (Elizabeth Craft Designs)

Card size - standard A2


Thanks for stopping by today

Wednesday, 5 October 2016

Squirrel Thanksgiving Cards

Good morning friends


I have a couple of squirrel Thanksgiving cards to share today, that my parents can give to our Grandkids. I made two of each design. The squirrel is an older stamp/die that I hardly ever use. I don't like that you have to stamp ON the die cut, rather than stamp then die cut. There is such a tiny border and it's very easy to stamp off the edge. I've ruined more squirrels than I've ever used. And there are no ejection holes in the die, which I find irritating.

However, with the MISTI - it's much easier to line up the stamping on dies from this company and I'm enjoying using them. Still don't like that there are no ejection holes though. Seems like it should be a basic thing to include in a die.


Once the squirrels were die cut from patterned paper, I used the MISTI to stamp them then added colour with Copic markers and added a touch of shimmer with a Wink of Stella pen & some Stickles. The nose and eyes are glossy.


Supplies:
Blueprints #24 - My Favorite Things
Squirrel - Papertrey Ink
Copic markers
Wink of Stella
Tree - Marianne Designs
Tree branch - Paper smooches
Stickles
Garden Bench Pop-Up (grass clump), Pop it Ups - Karen Burniston (Elizabeth Craft Designs)
Happy Thanksgiving - Reverse Confetti (not shown)

Card size - all, A2


Thanks for stopping by today


Sunday, 18 September 2016

Count Your Blessings

Good morning friends

I had a little bit of this beautiful textured pumpkin paper leftover, and made three Thanksgiving Cards with it. I only photographed one, since they are identical. The stamped fishtail banner is mounted with fun foam.


These will probably go to my parents to send out, as I make their cards as well as ours.

Supplies:
Beige Astroparche card stock
Patterned paper - K & Company
Blueprints #24 - My Favorite Things
Stamps - The Alleyway Stamps
Green card stock - Bazzill
Fun foam
Spiral Circle Pull Card (leaf), Pop it Ups - Karen Burniston (Elizabeth Craft Designs)
Stickles
Scalloped scissors

Card size - A2


Thanks for stopping by today


Thursday, 15 September 2016

Felt Embellishment Thanksgiving Cards

Good morning friends

One day last fall, I was wandering around Hobby Lobby and saw these felt stickers. I snagged a package knowing they would make cute cards for the Grandkids. Here are four of the cards I made with the stickers.


Supplies:
Felt embellishments - Hobby Lobby
Blueprints dies #24 - My Favorite Things
Blueprints #23 - My Favorite Things
Patterned paper - K & Company and Echo Park
Give Thanks  & Happy Thanksgiving stamp - the Alley Way Stamps
Flourished Happy Thanksgiving stamp - unknown
Pan Pastels
Hairspray
Words???
Beige Astroparche

Card size - all, A2


Thanks for stopping by today


Saturday, 3 September 2016

C4C352 - Pearlized Holiday Card Duo

Good morning friends

It's Saturday and a new month so that means a new challenge at the Crazy 4 Challenges Blog. Our September 2016 hostess is Raquel Mason and our Guest Designer is Fran Sabad (Stampers Blog)

Here is Raquel's Challenge:   When I was growing up in the North, there was a saying “Don’t wear white  after Labor Day”.  Make an all-white card.  You can add black, tan or another color as long as white is the predominant color.


I've been trying to use supplies from my stash that either haven't been used very often or haven't been used in a long time. For some reason, these lovely birch tree dies fall into both categories. I am going to get them out again soon as i'm very happy with how these cards turned out!


I added one of the Beach Edges by Karen Burniston as the snowbank - and everything but the cardinals were cut from a heavy, white pearlized card stock.


The cardinals were borrowed from a friend, but I am liking them so much I will be ordering a set for myself. They were cut from red card stock with double sided adhesive attached to the back.


Both cards have a gold embossed greeting, and the glitter dots on the front are red with gold edges.


The second card is nearly identical, but with a snowman instead of a deer.


Check out the C4C blog to see how the Crazies have been inspired by the challenge. We'd sure love to see your take on it, so be sure to stop by the Crazy 4 Challenges blog and link up your creations. If you are uploading to an online gallery, please use the keyword C4C352.

Supplies:
Pearl card stock - Gina K
Birch Trees Die - Memory Box
Blueprints #24 - My Favorite Things
Cardinals - Impression Obsession
Clear Double Sided Adhesive - Elizabeth Craft Designs
Beach Edges, Pop it Ups - Karen Burniston (Elizabeth Craft Designs)
Deer and Snowman - Papertrey Ink
Glitter Dots - Elizabeth Craft Designs
Words inside - Verve
Gold embossing powder

Card size - all, A2


Thanks for stopping by today

SaveSave