Monday, 14 November 2016

Colourful Brownie the Cow Pop-Up Card

Good morning friends

I wanted to play with some colourful striped paper and thought it would pare perfect with Els new Chevron Background die (Elizabeth Craft Designs). I cut the chevron piece out of white card stock, then adhered it to a slightly smaller striped panel. Just for fun, I added a few of the negative pieces back into the design - I love the stitched detail Els included on some of them.


She also added holes, so you can use the negative pieces as banners! I chose to add my banner pieces back into their spots with foam tape and Bakers Twine. Joset's sentiment was perfect - but I stamped it in a lighter colour that seemed lost on the card front. So I outlined each of the letters with a fine point black marker ... and I like the hand drawn look!


Here is the inside - I made it a Pop-Up card using Karen Burniston's Lucy Label Pop-Up and Brownie the Cow. Couldn't resist adding the cheerful stripes to Brownie's face.


Here you can see where I trimmed the bottom from the chevron piece, and attached the top portion to the top of the card and the bottom piece at the bottom of the card. This is something I wanted to try as soon as I saw the chevron background, and I'm happy that it worked out this well. I'll be doing that again for sure.


All in all I am quite happy with this card - it just makes me smile.

On a personal note - yesterday wan an uneventful day (yay!) and I know that now I am on the mend. That second hospital visit set me back a few days in my recovery, but I think I've finally realized that it's going to take another full week to 10 days to really feel like myself again. That alone is progress as I'm not a very patient patient. Ha!

Supplies:
Chevron Background Die - Elizabeth Craft Designs
White card stock
Striped patterned paper - Echo Park
Bakers Twine
Fun foam
General Sentiments - Elizabeth Craft Designs
Lucy Label Pop-Up, Pop it Ups - Karen Burniston (Elizabeth Craft Designs)
Brownie the Cow, Pop it Ups - Karen Burniston (Elizabeth Craft Designs)
All Seasons Tree (Clouds), Pop it Ups - Karen Burniston (Elizabeth Craft Designs)
Black glossy card stock - packaging for Elizabeth Craft Designs Embossing Folders

Card size - standard top fold A2

Thanks for stopping by today

Sunday, 13 November 2016

Sparkling Christmas Pop-Up Card


Good morning friends

I found a sheet of beautiful, sparkly holiday paper and couldn't wait to make a Christmas card. Below is the card front.


For the inside I used the Twist Circle Pop-Up by Karen Burniston for Elizabeth Craft Designs. See how the embellishment is sideways as the card is opened?


When the card is fully open, the centre embellishment twists up into the centre of the card. Here I used a coordinating printed piece to pop-up.


It might be hard to see in the photos, but the entire white area of the background is super sparkly. It's SO pretty!


I had been in a bit of a mo-jo slump, but as soon as I saw this lovely paper I knew what I wanted to do with it. Sometimes, that's all it takes to get the ideas flowing again.

I had to do another hospital run at 3am on yesterday, but everything got looked after and now I should really start to feel better. It wasn't fun, but it was necessary. My bloating and pain were down by half by the time I left the hospital so that was encouraging and I continued to improve throughout the day. My poor hubby is as tired of looking after me as I am of him having to do it.

He is such a trooper. He went golfing yesterday morning after he got me home & settled but I don't know how he could golf 18 holes and still keep his eyes open! Haha - I thought maybe he fell asleep on the way home from the golf course (he is the passenger this time) and his buddy was just driving around with him knowing he needs a good sleep. :-)

Supplies:
Twist Circle Pop-Up, Pop it Ups - Karen Burniston (Elizabeth Craft Designs)
Patterned paper, embellishment, and sticker - My Minds Eye
White card stock
Soft Finish Card Stock, 100# weight - Elizabeth Craft Designs
Rose card stock
Wink of Stella
Snowflake Border - Sizzix
Stitched Ovals - MFT Stamps
Blue card stock
Noel die - Lawn Fawn

Card size - 6 x 5"

Thanks for stopping by today

Saturday, 12 November 2016

C4C-363 Stitches and thread

Good morning friends

It's Saturday so that means a new challenge at the Crazy 4 Challenges Blog. Our November 2016 Hostess is Maryann Einam and our Guest Designer is Doreen O'Brien from Doreen's Dream.

Maryann's challenge is:  Stitches and thread add some form of sewing to your card.


I RARELY sew on my cards, but I knew I had these stitched felt elements in my stash. I made a Centre Step Christmas Card using sparkly papers, and the cute stitched elements for my challenge card.


I always find the Centre Step cards work better when you add an extra support layer to the arms, which I did inside with white card stock.


Check out the C4C blog to see how the Crazies have been inspired by the challenge. We'd  love to see your take on it, so be sure to stop by the Crazy 4 Challenges blog and link up your creations. If you are uploading to an online gallery, please use the keyword C4C363.

On a personal note, I am feeling better again today so the healing continues. I've decided to come off the prescription pain meds as they are SO hard on my system, instead moving to Tylenol. Which means the pain isn't as controlled as it would be with the narcotics. But worth it in the end I think. I'm not yet able to do any crafting or Zentangle, but thankfully had a bunch of cards made ahead so I could keep posting while I recover from the surgery.

Supplies:
Patterned paper - My Minds Eye
Centre Step card - Sizzix
White card stock
Stitched felt embellishments - K & Company
Labels and Circles, Pop it Ups - Karen Burniston (Elizabeth Craft Designs)
Red card stock - Bazzill
White card stock
Glitter Dots - Elizabeth Craft Designs
Inside stamp - Hero Arts

card size - Standard A2

Thanks for stopping by today

Friday, 11 November 2016

Holiday Robin Flip-It Card

Good morning friends

It's Flip-It Friday here on my blog, and I have a Christmas card to share today using a 5 x 7" Flip-It die from Sizzix.


The patterned paper has lovely gold foil bits in it.


I fussy cut the left side of the banner, stopping when I reached the edge of the panel on the right side of the card. Then I adhered it to the card being mindful of the score lines and folds. It was sort of a whim to try it and I'm happy with how it turned out.

On a personal note, yesterday was a better day. I still sleep for at least an hour after every pain pill but my neighbour (who has had 51 surgeries in her life) says sleep is the best way to heal. I was able to get in and out of bed without assistance so that's a big step forward. The Dr. gave me a note to give to my employer, that I would need to be off work for two weeks. So I guess I need to give it more time, - I'm only a few days into my recovery.

That same neighbour brought me over some Magnesium Oil Spray and it worked wonders on my back spasms.

I received a gorgeous bouquet of flowers from friends down here so that really made my day yesterday too.

Ok - I'm sure it's time for another sleep.

Supplies:
5 x 7 Circle Flip-It - Sizzix
White card stock
Patterned paper - DCWV
Stitched ovals - My Favorite Things
Stamps - Verve
Gold gel pen - Sakura

Card size - 5 x 7"

Thanks for stopping by today

Thursday, 10 November 2016

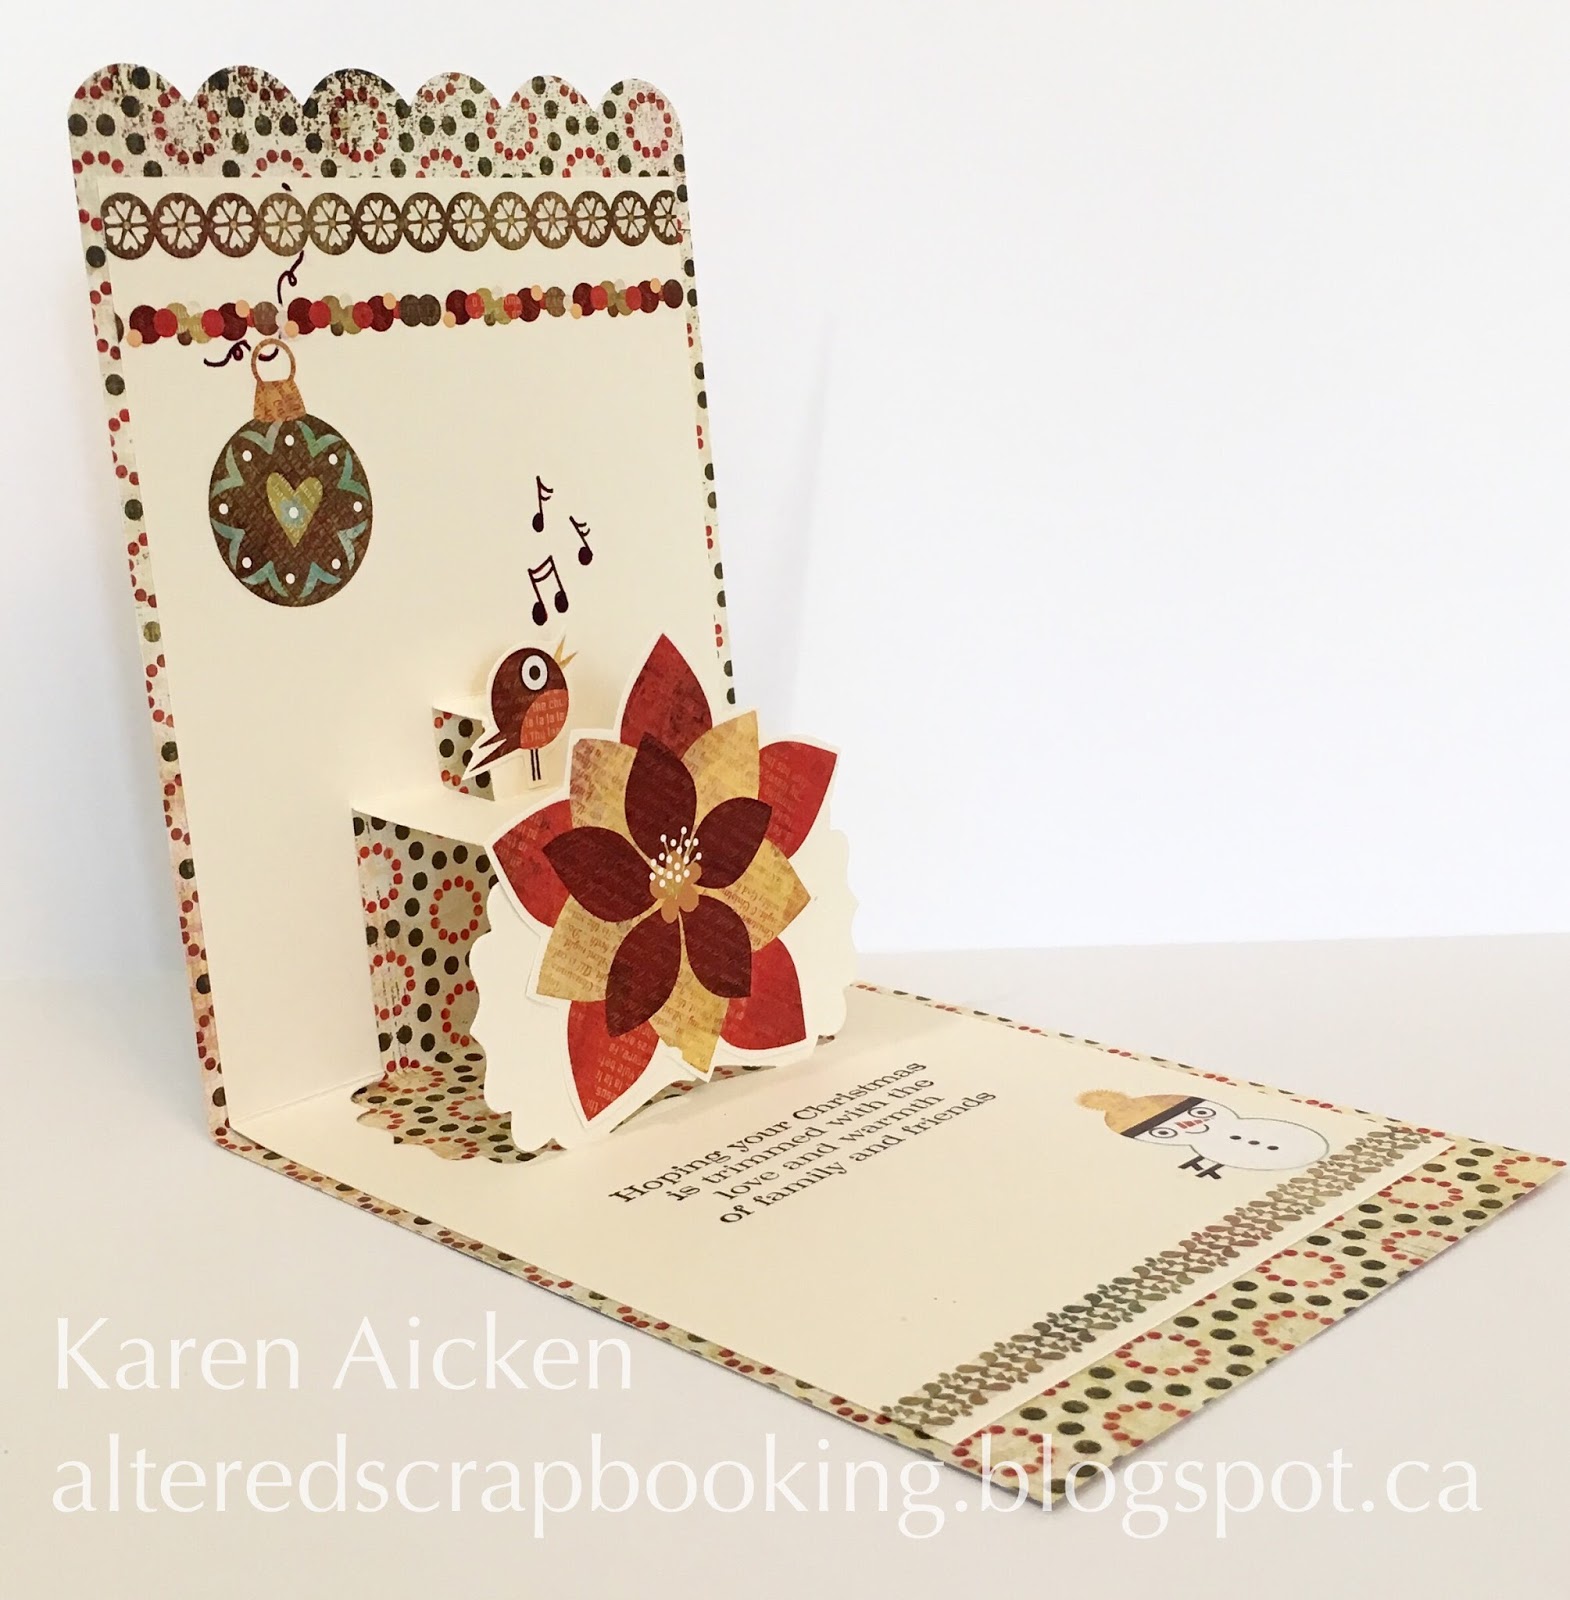
Floral Christmas Pop-Up Card

Good morning friends

I had this scalloped card base ready to be decorated for a holiday card. I like the scalloped card base, and cut quite a few from Christmas themed patterned paper a few years ago. Time to get those cards finished!


Inside I cut the Lucy Label Pop-Up from cream card stock, and decorated it with Rub-Ons from the same manufacturer.


Here is a side view to give you a better look at the Pop-Up.


On a personal note, I had a rough day yesterday, with lower back spasms and a fever. However, the fever stopped on it's own and I'm hoping the spasms will stop soon as well. It's hard to get your breath with them! On the plus side, I was able to have a shower and finally wash off all the iodine from the surgery. My belly was quite orange!

Hoping today is a better healing day.

Supplies:
Scallop Card - Sizzix
Patterned paper and Rub-Ons - Basic Grey
Cream card stock
Lucy Label Pop-Up, Pop it Ups - Karen Burniston (Elizabeth Craft Designs)
Words - Stampin' Up
Brown Fine Point Marker

Card size - 4-1/2 x 6"

Thanks for stopping by today

Wednesday, 9 November 2016

Christmas Tags From My Stash

Good morning friends

Today's share is two more Christmas tags, made using the Labels and Circles dies by Karen Burniston for Elizabeth Craft Designs.

The fabric deer embellishment was in my stash, as was the stocking sticker. That sticker was the last one on the sheet so I was happy to use it and be done with that sheet.


Els' Easel die (Elizabeth Craft Designs) is so handy for displaying the tags for photographing.

On a personal note, I ended up needing emergency surgery this week to remove my gall bladder. Not a fun couple of days, but I'm on the mend now. I was well looked after at Banner Hospital, our travel insurance was mostly cooperative (once they were told by the hospital that I was NOT fit for travel back to Canada for the surgery, which is what they requested), and our friends here in Arizona have been amazing. I was released from hospital yesterday and our little Cooper dog was VERY happy to have his mommy back home. He was quite distressed during my attack. Awwww.

Supplies:
Circles and Labels, Pop it Ups - Karen Burniston (Elizabeth Craft Designs)
Snowflake embossing folder - Elizabeth Craft Designs
Patterned paper - stash
White card stock
Bakers Twine
Stickers and deer embellishment - stash


Thanks for stopping by today


Tuesday, 8 November 2016

Pumpkin Penny Spinner Card

Good morning friends

Yesterday, fellow Designer Challenge Teammate Raquel Mason came up with the coolest Spinner/Slider card using the Ring Accordion. So brilliant! As soon as she showed us, I couldn't get it out of my head and had to try one of my own.

Raquel shared her card with the Designer Challenge Team a few weeks ago, and since I had Halloween on the brain I immediately went for a Halloween Spinner. I didn't think about the timeline,  or I wouldn't have made it in this theme. However, it will still work just fine and I can put it aside for Halloween 2017!

First I cut two Ring Accordion's from black card stock and adhered them together for stability. Raquel left her pivoting tabs on so she could have two separate slider/spinners (see? Brilliant!!) but since this was just a sample I cut the centre portion completely away and trimmed all the tabs. That means the pumpkin spins all the way around the 'track'.


I could't help myself and added wiggly eyes to the pumpkin embellishment. His toothy grin got the Glaze Pen treatment so they are nice and shiny in the light. So fun.


I don't know to do little video's for my blog, but here is another photo showing the pumpkin spinning around - he rolls so smoothly with the help of pennies.


Here is a peek at the inside. I just love that patterned paper with the multicoloured eyes. The 'Spooky' is a die cut embellishment, and it's actually glossy black which doesn't show up at all in the photo.


Now that I have this Penny Spinner/Slider card done, I have all kinds of ideas on others. It's been ages since I made one and I've been itching to do another slider card for the last little while. Raquel's idea to use the Ring Accordion was just what I needed. Considering this was just going to be the prototype, it ended up making a cute finished card!

Supplies:
Ring Accordion, Pop it Ups - Karen Burniston (Elizabeth Craft Designs)
Black card stock
Embellishments - K & Company
Glaze pen - Sakura
Patterned paper and stickers - Doodlebug
Purple card stock
Folded white card and envelope - Michaels
Clear double sided adhesive, 1/8" width - Elizabeth Craft Designs
Wiggly Eyes
Gel pen - Sakura
Wink of Stella
Bakers Twine

Card size - 6-1/2 x 5"


Thanks for stopping by today