Saturday, 6 September 2014

C4C252 Belated Birthday

A HUGE shout-out to my friends who helped me in my studio yesterday. We got so much done - another 30+ boxes packed!! I could not have done it without their help, so ... THANK YOU. THANK YOU!!!

Saturday means a new challenge for the Crazy 4 Challenges team, and a new month means we have a new Hostess and a new Guest Designer!  Danielle Lounds is our Hostess for September and you can check out her blog HERE.

Torico will be the Guest Designer this month and her blog can be found HERE.

Danielle challenged us to create a Belated Birthday card, so I pulled out the Snails2Mail stamp set.


It's so fun to paper piece that snail!


I used the Spiral Circle Pull Card (SCPC) by Karen Burniston for Elizabeth Craft Designs to create the card base - I love these Z-fold cards. I especially love that the die cuts the little notches that help keep the card closed until the recipient pulls the sides to reveal the inside.


I added some Peel-Off borders in black to dress up the sides a little.


Into my stash with this one, as it's always good to have a Belated Birthday card on hand.

Be sure to stop by and see what the Crazies have come up with for this challenge, and remember we'd love to see your projects too!

Supplies:
Card size: standard A2
Patterned paper - K & Co
916 Spiral Circle Pull Card, Pop it Ups - Karen Burniston (Elizabeth Craft Designs)
Stamps - The Stamps of Life (Snails2Mail and Insides4Snails
1134 - Border Peel Off's - Elizabeth Craft Designs)

Thanks for stopping by today!


Friday, 5 September 2014

100th Birthday Flip-It

Good morning friends!

W O W.  My friend and I worked in the studio yesterday, purging and packing. Mostly purging. Six of the large orange leaf garbage bags and 3 green garbage bags are outta here. Hubby is doing a dump run this morning before work so this stuff is REALLY outta here. I was brutal with what I was willing to keep and what I didn't want to have to pack, move and unpack.  I'm leaving a wonderful room with built in cabinets and drawers and a large island for working, and going to a big room with big windows. No cupboards, shelves or even a table! So it just doesn't make sense to bring everything, as hard as it was to part with some of it.

As of last night, there are 25 (yes, that's twenty five) studio boxes packed and ready to move, with 4 more partially done.  I assembled 20 more last night, ready for today. The same friend is coming in the morning and another friend in the afternoon so we will actually make a lot of headway today.

It's Flip-It Friday here on my blog, and I have a 100th Birthday card to share today that I made for Seniors Secret Service.


Such fun colours in this paper stack - it's just a pleasure to use it.  The card was popped into a clear bag envelope to let the colours show through.

Supplies used:
Circle Flip-It - Sizzix
Patterned paper - Stampin' Up
Scalloped Border - MFT
Letter and Number dies - PTI
Stamped words on front - PTI
Flower punch - Stampin' Up
Bling - stash
Stamped words inside - MFT
Circle Die - Spiral Circle Pull Card, Pop it Ups - Karen Burniston (Elizabeth Craft Designs)


Thanks for stopping by today!


Thursday, 4 September 2014

Sparkling Hearts Cards

Good morning friends!

It's my day to post on the Elizabeth Craft Designs Blog, and I wanted to give you a hint at what I'm sharing.  (Mom, if you are reading this please do NOT go check out that blog or it will ruin your surprise).  Smile.


I hope to see you there!


Thanks for stopping by today!


Wednesday, 3 September 2014

Floral Pop Up Card

Good morning friends!

Our eldest daughter and her family dropped by this past weekend, to check out all the changes in the house. Olivia and Ethan were SO excited that Grampa was here too - it was so sweet. Little Zachary is only 5 months old, but he is motoring. I couldn't believe it - he does this little 'army crawl' but he can really cover distance and he is pretty darned determined.

He and Cooper were having a staring contest, so I decided to step in and move Zachary into the family room and away from Cooper's kennel in the kitchen. That was after I had to move Zachary away from the dogs water dish, as he was pretty darned excited about that. Too funny.

Today's share is an older card. I spent the weekend packing and purging so don't have too much new to share. I did manage to get some of my Crazy4Challenges cards finished but that was it.


This card uses the Pop 'n Cuts A2 base with the label insert.


Supplies:
Card size: standard A2
A2 Pop 'n cut base with the label insert - Karen Burniston (Sizzix) 
Patterned paper and chipboard butterflies - K & Co
Brad - stash
Flower - made with Sizzix dies
Border punch - Martha Stewart


Thanks for stopping by today!


Tuesday, 2 September 2014

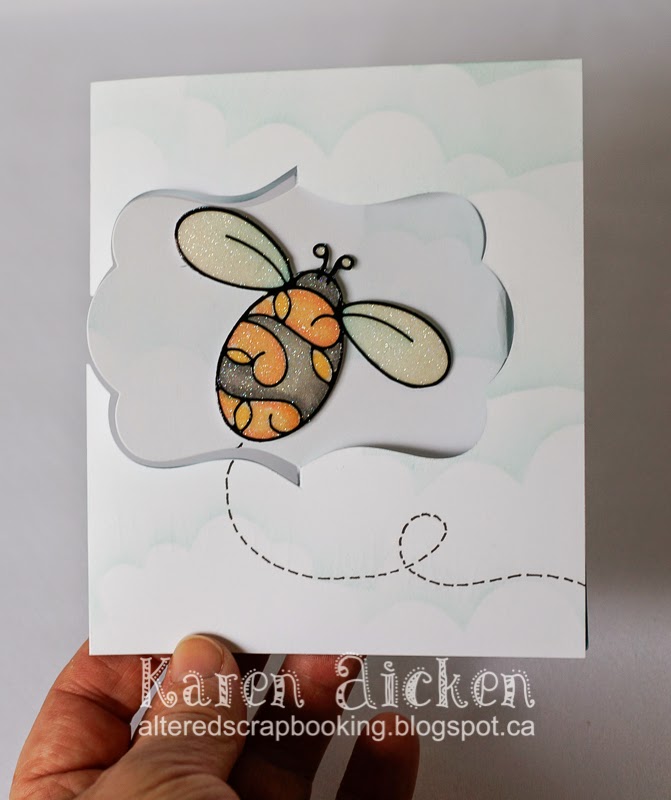
Sparkly Bee Pivot Card

Good morning friends!

I can't believe it's September - that means we move THIS MONTH! The time is just flying by, but we have a good supply of boxes now and that will make the packing easier. I can stop thinking about finding boxes all the time!  We are doing great with the purging too - hubby has done TWO runs to the dump and there will be one or two more before we are done. I have given bags and bags and bags away to the charity, and have at least a dozen boxes ready to go for this next round.

The new backsplash is on in the kitchen, but we are holding off on the grout until the new cabinets are installed next week. So now I can move things back into my kitchen AGAIN, although I'm getting good at tossing or packing items every time I have to move all these things.

I have friends coming over this week to help me start in the studio - probably the room in this house with the most stuff.  I have 9 boxes now and have barely made a dent. Yikes!

Today's share is a Katie Label Pivot card that was just plain fun to make. This was also for my Paper Pastimes demo in June and Carole had requested I do cards with no stamps. (The reason is that sometimes my cards use stamps that she doesn't have in stock, and customers usually want the exact stamps they see on demo cards.)  Easy peasy to make a card like these using Peel-Off's!


I used white card stock for the base, and sponged clouds on the front and inside with a hand made stencil, a sponge and dye ink. Then I added 1/2" strips of teal card stock to the inside edges for a pop of colour.

The bee's were done by attaching the Peel-Off's to double sided adhesive. When I open my package of double sided adhesive, I usually pick a couple of sheets and attach light weight white card stock to the back of them. That way it's ready for trimming and adding Peel-Offs to for glittering!  I poured on the Silk Microfine Glitter then burnished it in with my fingers after I poured off the excess. The burnishing really brings up the sparkle in this glitter, and is an easy step that should not be missed.  I added some colour with Tombow markers and let the pieces dry overnight.


When the bee's were dry, I fussy cut them out and attached them to the labels with foam tape. The flight trails were added with a fine point marker, as was the hand lettering.


Finally, here is the card from above and from the back:


Supplies:
Size - 5 x 4-1/4  (I like to play around with my A2 cards, trimming off 1/4 to 1/2" off one of the edges. It changes up the look of the card, but they still fit perfectly in a standard A2 envelope!)

768 Katie Label Pivot, Pop it Ups - Karen Burniston (Elizabeth Craft Designs)
2341 Lady Bugs Peel-Offs (Bees) - Elizabeth Craft Designs
Double Sided Adhesive - Elizabeth Craft Designs
641 Cool Diamond Silk Microfine Glitter - Elizabeth Craft Designs
White Card stock
Tombow markers
Teal card stock scrap
Black Pigma Micro Pen


Thanks for stopping by today

Monday, 1 September 2014

Buster Birthday Card

Good morning friends!

It's Masculine Card Monday here on my blog and today's share is a birthday card. I have a huge pile of 'odds and sods', so have decided to use them for cards to donate to Seniors Secret Service. This coloured dog piece was in the pile ... if you've been stamping a long time you will recognize 'Buster', a Mostly Animals stamp.

Sorry the pictures are so dark ...


I adhered wide brown ribbon and a narrow black ribbon below the image, to keep it feeling masculine.


Ahhh Buster ... I"m going to have to play with you more.


Thanks for stopping by today!

Sunday, 31 August 2014

Elizabeth Craft Designs August 2014 Designer Challenge

Good morning friends!

It's time for the Elizabeth Craft Designs DESIGNER CHALLENGE, and this month the challenge is "Asian".  There was a lot to choose from in the Elizabeth Craft Designs line, and it took me a few days to narrow down what I wanted to do.

For my first project, I finally decided on a Stand Up card …


For complete directions on how to make this type of Stand-Up card, see my posts HERE and HERE.

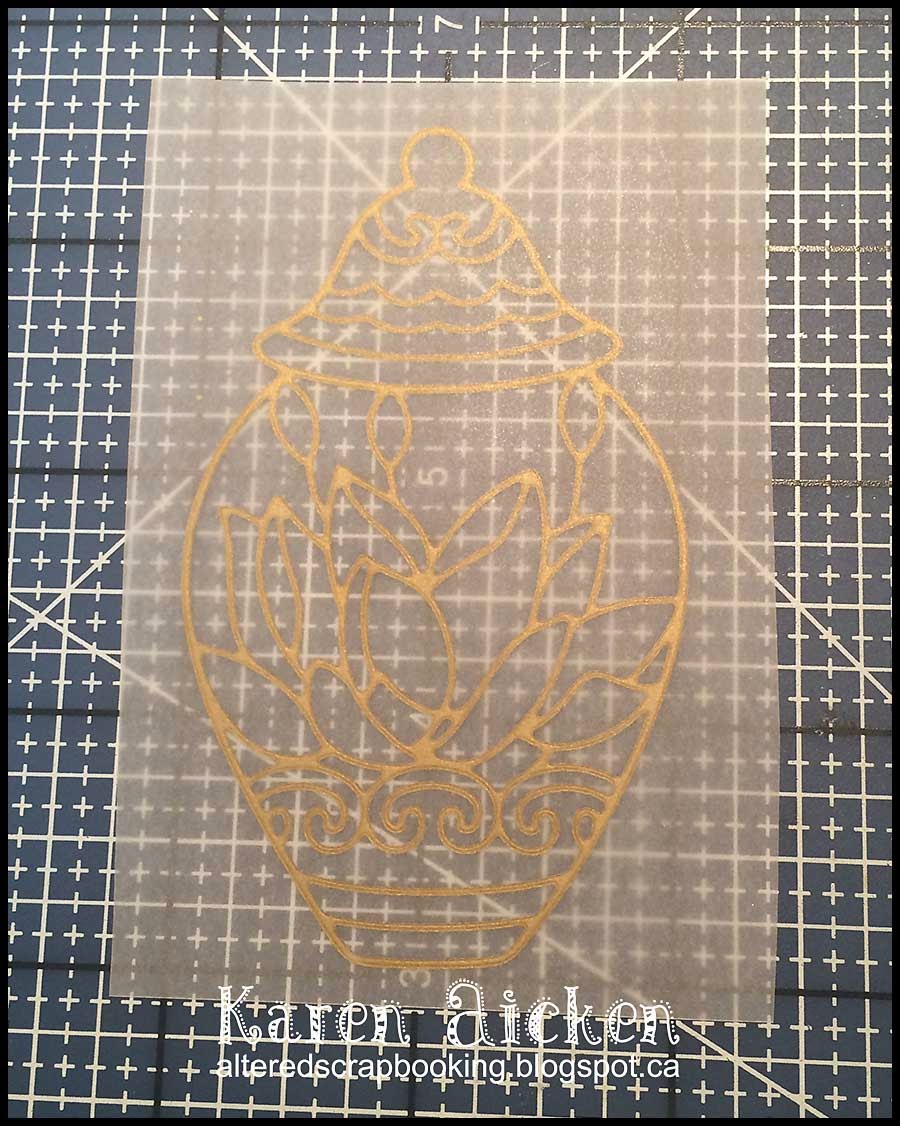
I started with the pretty Ginger Jar Peel-Off in gold, and attached it to a piece of vellum...


Then, I flipped it over and added colour with Copic markers on the back side. I love the soft look this gives the vase.


When I get a new package of double sided adhesive sheets, I usually take all but one and attach a sheet of lightweight white card stock to one side of the rest of them. I like having that step finished when I want to glitter Peel-Off's! I cut a piece from one of those card stock-backed double sided adhesive sheets, peeled off the liner and adhered the vellum to it. Then I simply fussy cut the vase and it was ready for mounting.

All the gold layers you see on my card are from a gold Shimmer Sheetz. The patterned card stock panel was attached to the slightly larger gold Shimmer Sheetz panel with strong adhesive, then I ran both layers through with an embossing folder. This gives a nice deep impression.


Here is the card in the closed position, and ready to pop into an A2 envelope!


I'm loving the new Word Stand-Up Helper dies, and chose Best Wishes for this card.


I don't usually back the word Stand-Up Helpers, but I wanted the gold to show through so I added a scrap of gold Shimmer Sheetz behind the word cut out.


Then, to make the back of the card nice and neat - I attached a panel of patterned paper to the back.


I was finished and heading back upstairs - I had already turned out the lights in my studio when I caught sight of a strip of Asian printed paper on my stamping area. Ha - I turned those lights back on and made a bookmark. No way I was going to let that mojo get away from me.


The patterned paper measured 10-1/2 x 2", so I scored it at 5-1/4, added adhesive to one side and folded it in half. Then I added the pretty Kimono Peel-Off adding colour with Copic Markers. This was fairly quick to put together, and will be a fun little gift to tuck in with a card.

While the carpet installers were at our house last week, I had some time in my studio. I decided to go ahead and make a second card for the challenge! I was inspired by a couple of things for this card. Karen Burniston did an AMAZING card using white images outlined with a black pen, so I outlined inside the gold peel-off with a black fine point pen.


One of the other ECD Design Team members shared their challenge card and they had used dragonflies, which I thought was brilliant. I didn't want to just copy the idea, so instead perched a butterfly on top of the vase.

The pretty metallic card stock was from a small stack I made a couple of years ago. I'm finding all kinds of things as I start to pack up my studio!


Inside, the Happy Birthday is cut from the same metallic card stock and I will use a gel pen to sign out names on the black card stock.


I added the floral border sticker to the last scrap of the metallic card stock, fussy cut it out and adhered it to the bottom edge of the panel. The panels were outlined with a Stardust pen for lots more sparkle and shine, and I added gold to the butterfly and flowers with a marker.


Supplies for first card and bookmark:
Card size - Standard A2
934 Best Wishes Stand-Up Helper - Elizabeth Craft Designs
2516 Asian Vases - Elizabeth Craft Designs
2517 Kimono - Elizabeth Craft Designs
SS 0212Gold Shimmer Sheetz - Elizabeth Craft Designs
E-106 Dancing Leaves embossing folder - Elizabeth Craft Designs
Patterned paper - DCWV
Vellum - stash
Score Tape
Tassel - stash

Supplies for second card:
Card size:  4-1/4 x 5"
2516 Asian Vases Peel-Off's - Elizabeth Craft Designs
1262 Ribbon Flowers Peel-Off's - Elizabeth Craft Designs
2342 Butterflies Small Peel-Off's - Elizabeth Craft Designs
738 Lg Happy Birthday - Elizabeth Craft Designs
Black card stock
Hand-made metallic card stock
Gold marker - Pilot
Pink Gel Pen
Sakura Stardust Gel Pen
Black fine point pen - Zig Millennium 

Be sure to check out the Elizabeth Craft Designs Blog today to see Joset's post and all the Designer's Challenge cards!

Thanks for stopping by today!