Showing posts with label Cricut. Show all posts

Friday, 23 December 2016

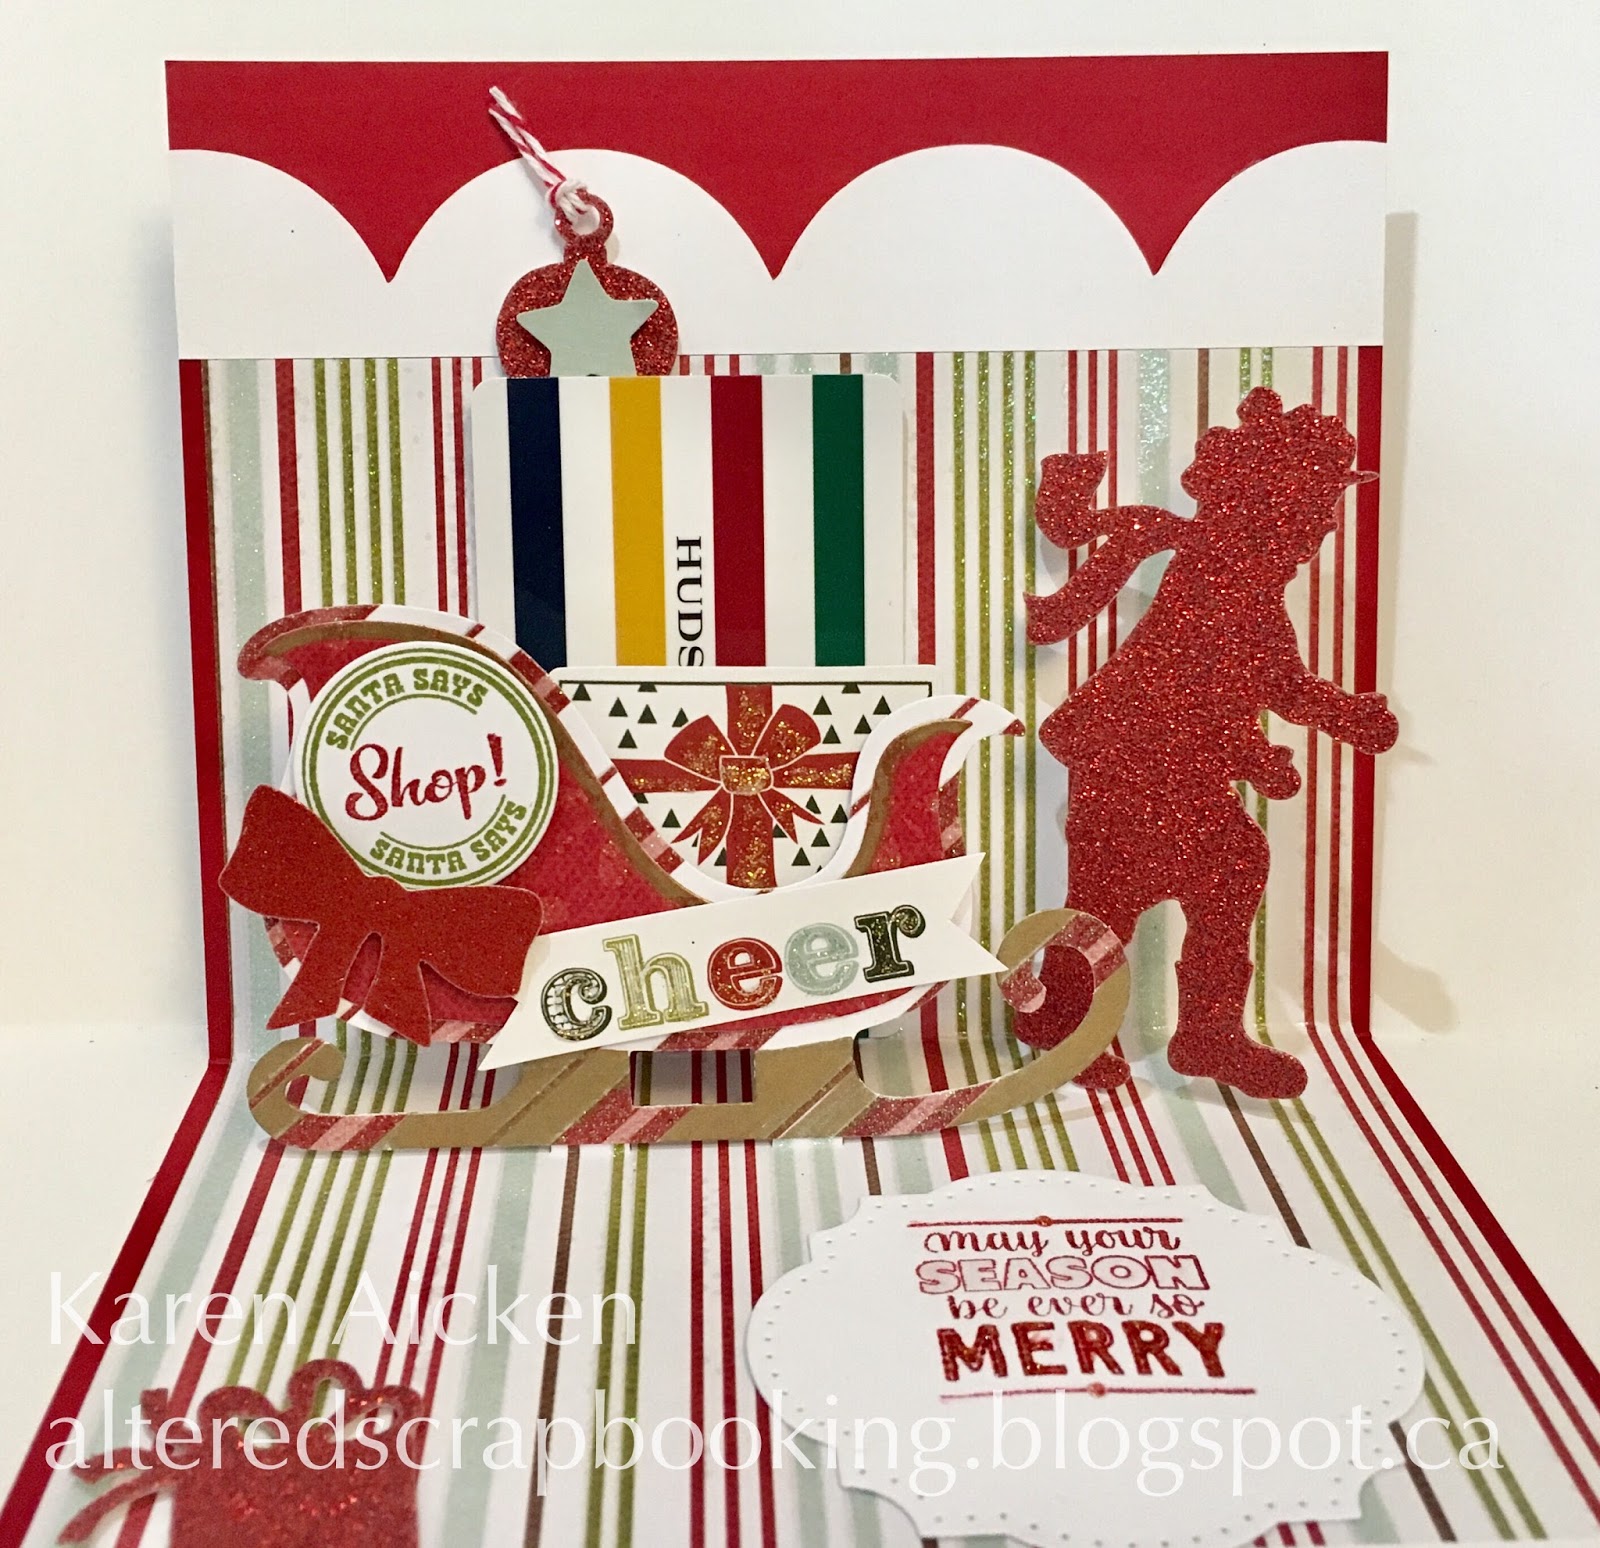
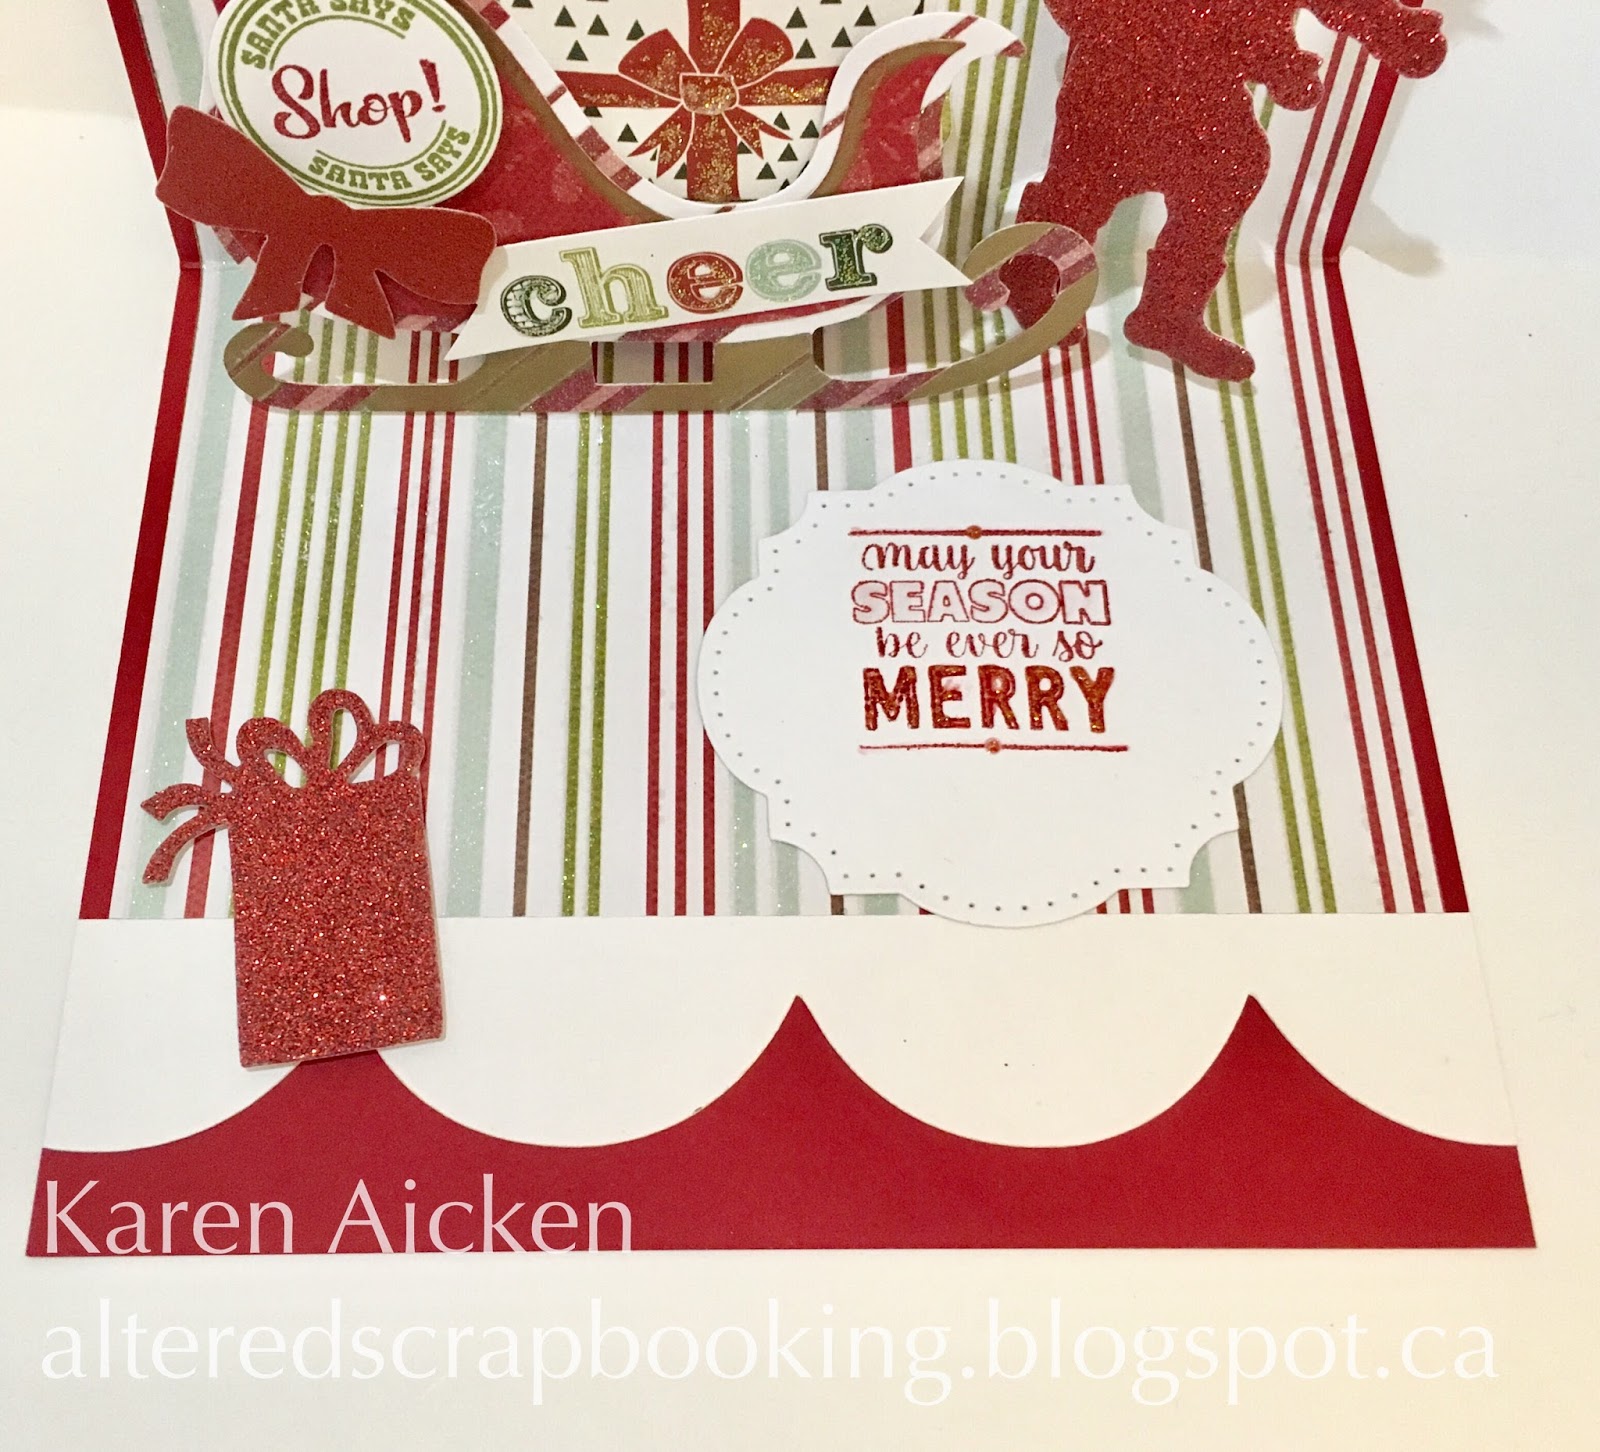
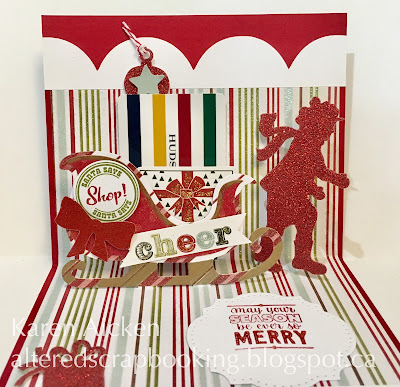
Sleigh Full of Cheer, Pop-Up Gift Card Holder

Good morning friends

***NOTE:  I will be moving my blog to Painted Mountain Cards in the New Year.  I will leave this blog open, as there are frequent hits from Pinterest and over 5 years worth of cards etc to reference.


Todays share is another Christmas Gift Card Holder I made using Karen Burniston's Sleigh Gift Card Holder.


The large white scallops have been in my stash for years - they were Cricut pieces that weren't needed for whatever project I was working on at the time. They make me want to dig out my Cricut and cut some more!


Inside, you can see the striped Hudson's Bay Gift Card tucked into the slots that cut with the Pop it Ups die.

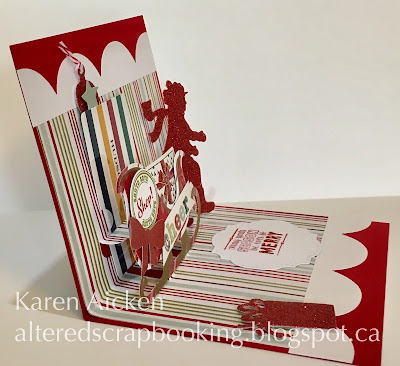

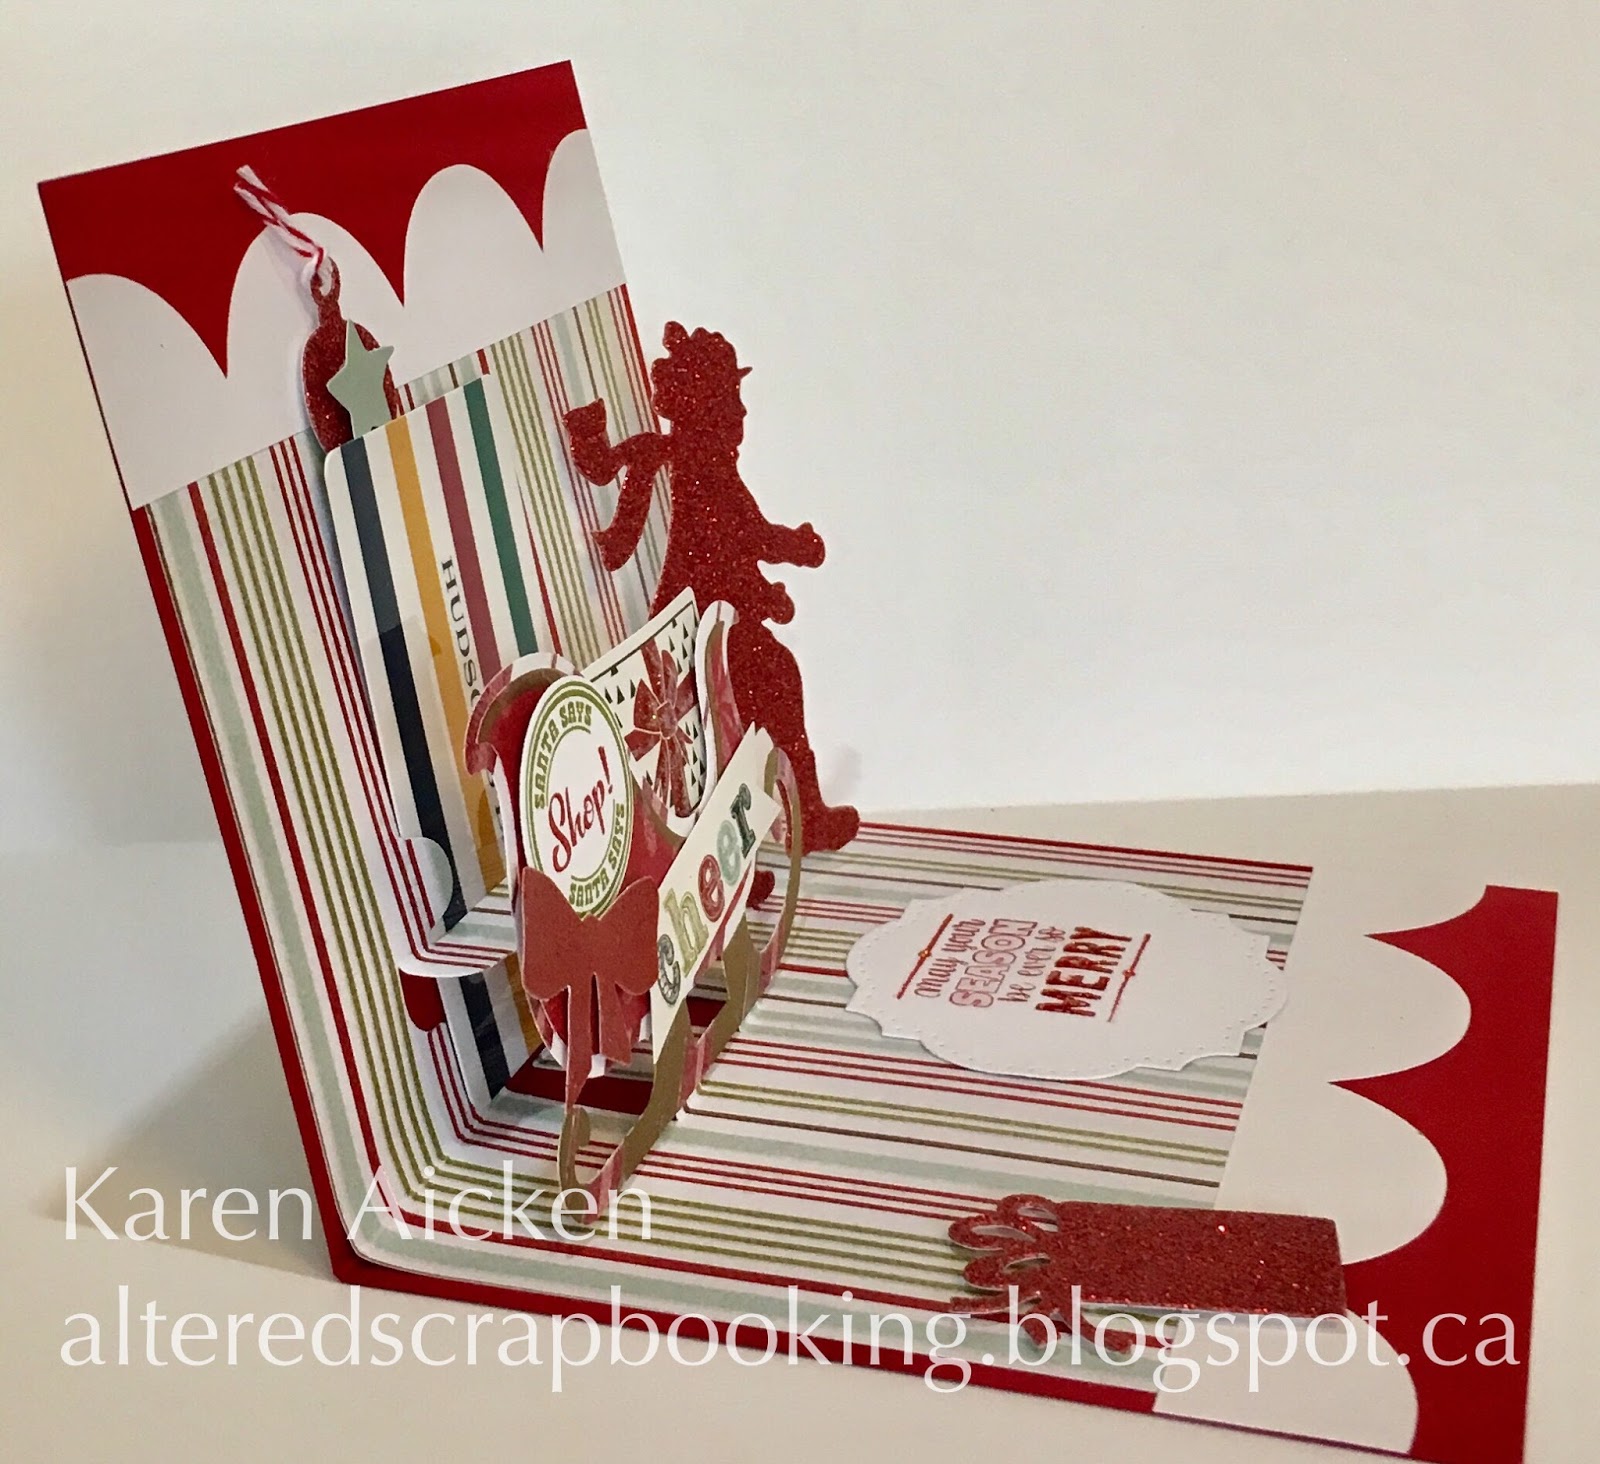
Finally, a side view so you can see the pop-up a little better.

Supplies:
Sleigh Gift Card Holder, Pop it Ups - Karen Burniston (Elizabeth Craft Designs)
Patterned paper - My Mind's Eye
Gold Sharpie marker
White card stock
Printed embellishments - My Mind's Eye
Glittered Embellishments - K & Company
Stitched circle - MFT Stamps
Wink of Stella
Merry & Bright Clear Stamps, Pop it Ups - Karen Burniston (Elizabeth Craft Designs)
Ring Accordion (circle), Pop it Ups - Karen Burniston (Elizabeth Craft Designs)
Large Scallops - Cricut cut from my stash
Labels & Circles, Pop it Ups - Karen Burniston (Elizabeth Craft Designs)
Holiday Clear Stamps, Pop it Ups - Karen Burniston (Elizabeth Craft Designs)
Bakers Twine
Stickles

Card size - 5 x 6"

Thanks for stopping by today

Sunday, 18 December 2016

Polar Bear Christmas Cards

Good morning friends

Using Things Up (otherwise known as Whittling Down The Stash) has been the name of the game for our holiday cards this year. These Polar Bear cards have been in progress for at least 4 years.


The Polar Bears were Cricut cut from the Joys of the Season cartridge, and I did the printed panel on the computer. To complete the cards, I simply assembled the polar bear layers and stamped a greeting on the white area of the panel. The panel was cut with a stitched panel Blueprints die and adhered to the A2 card fronts.


The eyes and ears were dotted with a clear Glaze pen so they catch the light. I used the snowflakes from the All Season's Tree, which cut 3 at a time.


I forgot to mention that I used the MISTI for the stamping. The MISTI makes it SO easy to quickly - and perfectly - stamp multiple images.


***NOTE:  I will be moving my cards and paper crafting to Painted Mountain Cards in the New Year. I've been thinking about it for a long while, and the New Year seems like a good time to make the change. I will leave this blog open, as there are frequent hits from Pinterest and over 5 years worth of cards etc to reference.


Supplies:
Polar Bears - Cricut, Joys of the Season cartridge
Snowflake panel - created on computer
White card stock
Blueprints #24 - My Favorite Things
Misti  - My Sweet Petunia
Stamps - Papertrey Ink
All Seasons Tree (snowflakes), Pop it Ups - Karen Burniston (Elizabeth Craft Designs)
Tweezers - Elizabeth Craft Designs
Glaze Pen - Sakura

Card size - A2

Thanks for stopping by today

Saturday, 5 November 2016

C4C 361 Strawberry Challenge Crd

Good morning friends

It's Saturday so that means a new challenge at the Crazy 4 Challenges Blog, and since it's a new month we also have a new Hostess! Our November 2016 Hostess is Maryann Einam and our Guest Designer is Doreen O'Brien from Doreen's Dream.

Maryann's challenge is:  Who resist fresh fruit that is in season, for me it is strawberries, so add some to your card. You don't like strawberries, just add you favorite fruit.

My knees had been really painful and filled with fluid so not working that well at all. I needed to do things that required little walking so I went through my bin of stamped, die cut and Cricut cut embellishments. Haven't looked in that bin since we moved and that was over two years ago! Found lots of fun goodies I look forward to creating with in the near future. One was a couple of these Cricut cut barrels, all inked and assembled and ready to go. Perfect timing for Maryann's challenge!


I chose a Centre Step card and some strawberry stamps & dies that I got when I belonged to the Stamps Of Life Die Hard club. I only used them once or twice so the challenge also worked for me trying to use some of my older products as well. The cute little fence? It's a Sizzix original die that I've had almost since I got my first Big Shot and it still makes me happy.


A little hand lettering inside and my card is ready for my Mother in Law's upcoming birthday.


Check out the C4C blog to see how the Crazies have been inspired by the challenge. We'd  love to see your take on it, so be sure to stop by the Crazy 4 Challenges blog and link up your creations. If you are uploading to an online gallery, please use the keyword C4C361.

Supplies:
Strawberries, stamps and dies - The Stamps of Life
Barrel - Doodlecharms cartridge
Brads
Stickles
Centre Step Card - Sizzix
White card stock
Fence - Sizzix
Kraft card stock

Card size - standard A2


Thanks for stopping by today

Thursday, 13 October 2016

Spooky Tree Pull Card

Good morning friends

My card today uses another one of those Cricut cut embellishments I had in my stash ... a flourished spooky tree.

I paired it with the Rectangle Pull Card by Karen Burniston for Elizabeth Craft Designs and some sparkly Halloween papers.


Supplies:
Black card stock
Gold pearl card stock
Patterned paper - Recollections and First Edition
Rectangle Pull Card, Pop it Ups - Karen Burniston (Elizabeth Craft Designs)
Flourished Tree (Cricut - stash) - Celebrate With Flourish cartridge
White card stock
Accordion Rectangle (small rectangle), Pop it Ups - Karen Burniston (Elizabeth Craft Designs)
Stamp - Michaels
Pan Pastels, Kit #1 - Elizabeth Craft Designs
Gold pearlized card stock

Card size - A2

Thanks for stopping by today

Thursday, 6 October 2016

Flourished Pumpkin Stand-Up Card

Good morning friends

I went hunting through my stash of pre-made embellishments, and found a couple of Halloween ones that I cut with my Cricut years ago. Time to use them! I chose the flourished pumpkin and made a Stand-Up card as the base.


Hard to see in the photos, but there are a couple of spiders on the card that have shiny bodies and pom-pom bodies. My kind of spider.


Finally, a peek at the inside ...


Supplies:
Black card stock
Patterned paper - First Edition
Royal Stand-Up - Sizzix
Stamp - Michaels
Spider Stickers - Recollections
Cricut
Celebrate With Flourish cartridge
Card size - A2

Thanks for stopping by today


Thursday, 28 January 2016

Circuit Cut Wedding Card

Good morning friends

It's Throwback Thursday here on my blog and I have a pair of older cards to share today ... MUCH older.


The accent was cut with my Cricut and the Paper Lace cartridge, then the whole piece was embossed with clear powder. I adhered the flat gems with my iRock tool.


It never takes twice as long to make a second card while you have all the supplies out, so I made a second one. I think that second one is still in my stash, but the first one was given to a Bride and Groom.


Thanks for stopping by today

Thursday, 3 December 2015

Pop Up Doll and Rocking Horse Holiday Cards

Good morning friends

It's Throwback Thursday on my blog, and I have a couple older Christmas cards to share today. I believe I made these two years ago, but never did get the photos posted. The card bases were cut using a Sizzix scalloped edge die, and the mistletoe was Cricut cut. They were one of the very first things I cut when I got my Cricut and I cut about 10 of them. It's taken awhile to get them all used up!


The plaid patterned paper has glossy strips in the plaid pattern which adds so much to a card.


Inside the first card is a stamped label and a K & Company embellishment. The pop up portion was cut using an older Karen Burniston Pop 'n Cut die.


The only difference in the second card is the rocking horse embellishment instead of the doll.


Thanks for stopping by today 


Thursday, 1 October 2015

Cowboy Boot Card

Good morning friends

It's Throwback Thursday here on my blog, and I have an older card to share today. I made it using my (now dusty) Cricut, an embossing folder and a recycled printed paper bag.


The leather twine was from packaging on a candle.


Thanks for stopping  by today


Thursday, 10 September 2015

Pretty Tag Cards

Good morning friends

It's Throwback Thursday here on my blog, and I have some older Tag Cards to share. These are large cards - 5 x 7" - from K and Company that I found on clearance at Michaels a few years ago.


I added layered die cut butterflies with a gem in the centre to each card...


... and tied them with a pretty ivory satin ribbon.


Inside I added a punched butterfly and a Cricut cut scalloped border.


These cards were all sold at a Craft Sale we had a few years ago.

Thanks for stopping by today


Thursday, 3 September 2015

Three Panel Card

Good morning friends

It's Throwback Thursday here on my blog, and I have an older Three Panel Card to share today. (I just made that name up).  A long time ago I stumbled on some K & Company mixed printed cards on clearance at Michaels and I confess to grabbing all the remaining boxes. The Three Panel Card was one of the styles in the box.

This is the card closed, and ready to be put in the envelope.


When you lift up the flap, you have this panel ...


...and then that panel opens down from the top! I added lots of card stock & printed paper layers, scalloped Cricut cut borders and lovely 3-D stickers which are also from K & Company.


I think I had 5 boxes of the cards, so I ended up making five of each of the cards to have in my stash. There are only a few left now.

Thanks for stopping by today


Friday, 4 July 2014

Cowboy Boot Card

Good morning friends!

I have an older card to share today, to celebrate the start of our Calgary Stampede.  I love the Stampede, but with these sore knees I don't think I will be able to go down to the grounds or participate too much this year. Thank goodness there will be a lot of coverage on the TV so I'll be able to keep up on all the festivities.


I used the Cricut to cut the cowboy boot using the Old West cartridge, with vintage papers, a leather tie and a paisley embossing folder to echo the theme.

Thanks for stopping by today!


Saturday, 22 March 2014

Flowered Gift Box

Good morning friends!

I'm cleaning up older photos in my file ... so today's share is a 2-4-6-8 Box I made for my Mom awhile ago.

These are SO easy to make, and I've seen them made into little Bride and Groom boxes for wedding favors, or done up for Halloween.   Usually you use half of a letter sized piece of card stock (8-1/2 x 5-1/2") , but since I had this piece of heavy patterned paper I decided to go with a 6" height instead of 5-1/2".

You score your card stock along the long side, at 2" ... 4" ... 6" ... and 8".  Then you turn it 90 degrees and score down the length at 2".  (Thus the name 2-4-6-8 Box!)


Then it's a matter of simple snipping up to the bottom score line creating the bottom flaps, and attaching the box together with the 1/2" flap. After her earrings was popped in the bag, I pinched the sides & closed it with a label punch punched from the same patterned paper  This is a look at the back ...


I had a few flowers assembled and in my 'Odds & Sods' pile, so attached one to the front of the label.


A pretty way to give a small gift, and the boxes don't take very much time at all.

Supplies used:
Patterned paper - unknown
Cricut cut flowers from my stash
Label punch - Stampin' Up

Saturday, 25 January 2014

Hi Deer

Good morning friends!

Today's share is an older Pop 'n Cut card that I made as a 'Love Note' for our Grand-daughter.


The deer & flower were Cricut cut and sitting in my "Odds & Sods" pile. I added a couple of sparkling green scraps to the card, and a label that was also in the pile.   I die cut the clouds and outlined them with my Sakura gel pen for some shimmer ... stamped the 'hi' on the front and I was done.  Olivia is two, so any other details would be lost on her.


I like to pop things into the mail for the Grand-kids, so they can appreciate the feeling of getting something in the mail that's just for them.

That being said, the town of Langdon is sometimes without mail service!!!  I'm pretty sure they are breaking all kinds of Federal Laws but that doesn't seem to phase Canada Post.   I have to be sure mail is actually getting through to the town before I will mail anything there. I heard at Christmas they were just returning everything to the sender sbecause mail was piling up so much. Go figure.

Supplies used
A2 Pop 'n Cut base with included circle label insert, Karen Burniston (Sizzix)
Patterned paper - Kaiser Craft, Summer Breeze and scraps from DCWV Songbird
Hi stamp - Stamps of Life

Thanks for stopping by today!