Wednesday 30 January 2013

Triple Time Christmas Challenge Card

The challenge this week at the "52 {Christmas} Card Throwdown" is Triple Time Stamping. This was also a featured in a recent newsletter from SplitCoast stampers, and I found it quite intriguing.

Instead of stamping though, I used patterned paper for all my layers.


I used the bottom right corner of a patterned 12x12" sheet of scrapbook paper (the bottom left corner was used for my Penguin card on THIS post).


Since this was my first time doing this type of layering, I wasn't sure how deep I wanted the layers. I used the Stampin' Up Dimensionals instead of regular foam tape because they give height without giving too much height.  For the little banner at the bottom, I used a dimensional at each end and a regular foam tape piece in the center for a slightly bowed effect. 


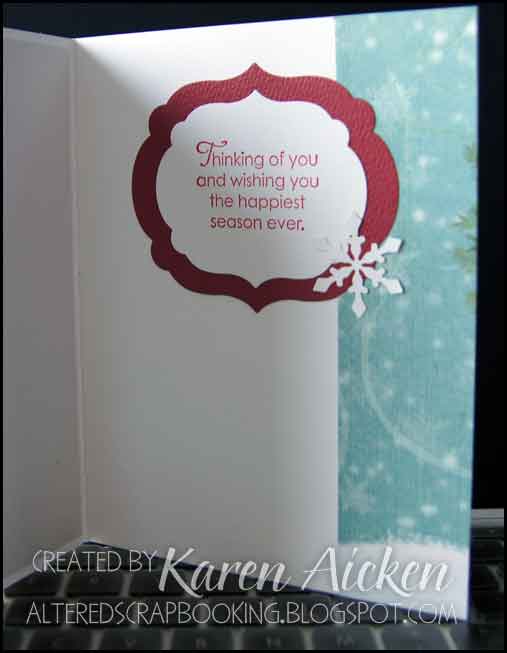
 I dressed up the inside of the card a little, and also made a matching envelope.  :-)

My penguin card was chosen for an Honourable Mention over at Merry Monday's, so that was quite a thrill as well.


I am sure enjoying making my Christmas cards this way - one at a time with no pressure to make multiples. I'm also enjoying making my cards in this larger size instead of the A2 that I have done for so many years. 

Thanks for stopping by today!

Tuesday 29 January 2013

Masculine Card for Dynamic Duo's #37

I always enjoy the monochromatic challenge at Dynamic Duo's, so really wanted to play along this week. 


I decided on a masculine card, and even had it done in time for Masculine Card Monday ... but I didn't get the photos taken until this morning.    :-)


The card is 5 x 6.5", made from a really nice light brown textured card stock I had in my stash. I added a kraft panel (embossed with a folder) and the image was stamped with brown on a cream panel.


I added a matching shrub image to the inside, and the envelope in 'creamy caramel' ink.


It's c-c-cold here today, minus 34 with the windchill!  I have the fireplace on and am going to hopefully get my kitchen counters cleared off and cleaned. My reward for doing that will be to get some time in the studio later today!

Thanks for stopping by today.


Sunday 27 January 2013

Seize The Birthday Challenge 3

I am going to need quite a few birthday cards in the next little while, so I am so happy about the Seize The Birthday challenge blog.  Here is this weeks' sketch - we are to use it and make a feminine birthday card. 


Last week I used their sketch to make our Grandson a birthday card for my parents to give him. This week I used the same paper stack and made a birthday card for them to give our Granddaughter!


The elephant was cut out of patterned paper, then glued to a piece of card stock before fussy cutting out. That gave the piece enough stability to be added with foam tape.  Before attaching it though, I outlined it with my Sakura gel pen for a touch of bling. Every two year old should have a little bling on her birthday.  :-)


I used another piece of the patterned paper for the inside of the card, and hand wrote that sentiment with a pink pen. The little envelope decoration was also trimmed from a piece of the patterned paper in the stack. I'm really like the 'kraft with pink' colour combination in this paper stack!


And for some exciting news ... the Zebra card (See THIS post) that I submitted for last week's challenge was selected by the design team for an honourable mention!  Woot Woot! 


Pretty exciting stuff! Enough to swell my head, ha ha.

Thanks for stopping by today.

Friday 25 January 2013

Merry Monday #46

My friends D & J came over on Tuesday to play in the studio, and I actually got a card made for the latest Merry Monday challenge. This week it's a theme challenge, and we were to use BIRDS.


I actually made two nearly identical cards, and they ended up being a joint effort of ideas from all three of us.  :-)  I knew I wanted to use the 'Stamps By Judith' penguin, and was having trouble finding a winter or Santa hat stamp in my collection. D suggested I use the 'Stamps By Judith' toque, but I felt it was too big. "Trim it down" she said ... and it worked out totally cute.


For the background, I used the bottom left portion of 12x12" scrapbook paper. You can see the lovely pearlized swirl on the photo below.


They also suggested I add glitter glue dots over the printed trees and I'm so glad I did! Some glitter on the pom pom, Glossy Accents on the hearts, beak and feet, some pop dots and my card was almost done. Finally I stamped the words on scraps of white and cut them out with a banner die. 

Below is a peek at the inside of the card - I thought it would be fun to add the penguin again there.


I stamped the full hat on the envelope fronts along with some random dots (also Stamps by Judith).


All in all, these were such fun cards to make.

Thanks for stopping by today!


Wednesday 23 January 2013

Card for Dynamic Duo #36

I am going to need a couple of wedding anniversary cards this month, so decided to play along with the Dynamic Duo challenge this week and make one of them.


The 'Dessert Option' was to make it a Valentine Theme but since I have all the Valentine cards I will need this year I am opting out of dessert. Ha! I don't say that very often.


I had these rose stickers in my stash - and they work well on cards that will be hand-delivered. Looking at the photo, it looks like the red panel should have been embossed with a texture folder but it is actually a lovely red linen so there is texture that doesn't show in the low-res web photo.

Now, to make a gift card holder to go with the card!

Thanks for stopping by today.

Monday 21 January 2013

Christmas Card for January Recipe Challenge

This weeks challenge at '52 Christmas Card Throwdown' is a recipe challenge:  Use patterned paper and glitter, AND decorate the inside of your card.  I made a 6.5 x 5" card, and a 3x3" mini card.


 I used a glittered chipboard package bow, and the patterned paper is also glittery.  :-)


I decorated the inside of the card as well, but didn't take a picture! I'll have to take a picture of it with my cell phone later and update the post.

EDITED:  Here is a picture of the inside ... a little blurry.


I didn't decorate the inside of the mini card, just the outside (with another glittery chipboard sticker) and the envelope.


Thanks for stopping by today!

Saturday 19 January 2013

Seize The Birthday, Sketch 2

Today's share is photo-heavy - it's my card for this weeks challenge at Seize The Birthday:

I rotated the sketch, because I wanted to use this fun chipboard zebra sticker and it worked better in this orientation.  The card is for my Grandson's first birthday - which isn't for awhile - but this way the card for my parents to give him is finished!

Since the card will be hand delivered I was able to coordinate the envelope with the card:


I made a folded banner and hand wrote the words - but the number one was die cut out of heavy charcoal StarDream card stock and attached afterwards.


I barely knicked the edges with a small circle punch, which helps the bakers twine stay in place.

In order to pop up the chipboard zebra sticker, I peeled it off the plastic backing paper and attached my foam tape. Then - BEFORE I removed the foam tape backing, I brushed baby powder all over the adhesive on the sticker. So the only sticky parts were under the foam tape backing. Works like a charm and smells good too.  ;-)


The little zebra was fussy cut from a scrap of the same patterned paper as I used on the bottom front of the card.


Finally, here is a peek at the inside:


Thanks for stopping by today - have a great weekend!


Thursday 17 January 2013

Freshly Made Sketch #69

Funny how different things work to come together and inspire a card. I looked at the latest sketch at Freshly Made and decided that I probably wouldn't play along this week. Nothing came to mind so I was ready to move on.


This week, when I got together with friends in my studio, D was working on a couple of Bridal Shower cards. In the back on my mind I was thinking I should probably be making one of those for our nephew's fiance's upcoming shower.

After my friends left, I was putting away the dies that I had been working on organizing and my little case of small embossing folders fell out of the cupboard. Right on the top was one that said 'Bridal Shower'. Hmmmm....

As I went to put something else away my eyes fell on my box of VELLUM and all of a sudden I knew exactly what I wanted to make - using that sketch at Freshly Made!


I rotated the sketch to work better with the papers I chose, and added a sparkly vellum panel over the patterned pieces with a sparkly brads. The Bride-To-Be LOVES bling. You can't see it in the photo, but I outlined the edge of the white 'Bridal Shower' piece with a sparkly Sakura pen and it really catches the light.


I will pen the words inside when I figure out what I want to say in the card, and the white word panel was also outlined with the sparkly pen.


In order to cut the triangle pieces for the card front, I cut two identical squares. Then I cut each square in half, which left me with 4 triangles. Two I used on the front of the card, so I decided to use the 2nd two on the envelope.


I embossed a white square with two other embossing folders, and attached it over my patterned rectangles, then used another piece of the same paper to line the envelope:


Now I have my card finished for the shower, AND I got to participate in a challenge that initially I was going to pass on this week.

Thanks for stopping by today.

Monday 14 January 2013

Merry Monday #45 Sketch Cards

I wanted to play along with the latest Merry Monday sketch at Always Playing With Paper


I made one card (6.5 x 5"), and a mini card/gift enclosure (3x3").  Both envelopes have some holly embossing on them.


For the large card, I embossed a white panel with a birch tree embossing folder and attached it to the front of the card.


I used a holly embossing folder to emboss the left side of the envelope:


And here is a peek at the inside:


I have a bunch of envelopes that fit a 3x3" mini card, so thought it was time to crack open the package.  The envelope flap and white panel were embossed with the holly embossing folder.


Another card for my Christmas Card 2013 stash - and a start on my mini-card collection too!

Thanks for stopping by today.